Announcement

Collapse
No announcement yet.

SC Coupe Restoration

Collapse
X
 
  • Filter
  • Time
  • Show
Clear All
new posts

  • Thanks Phil and Bruce for your help. I really like the idea of using the hole in the dash to check headlight position. I did several left to right measurements all the way back to the quarter windows. After sleeping on it, I'm feeling more and more comfortable with the fit of the replacement nose.

    Another thing I did was to install the bumper bracket and shim the nose off of it, so it can't move during welding. Also to make sure in lines up.

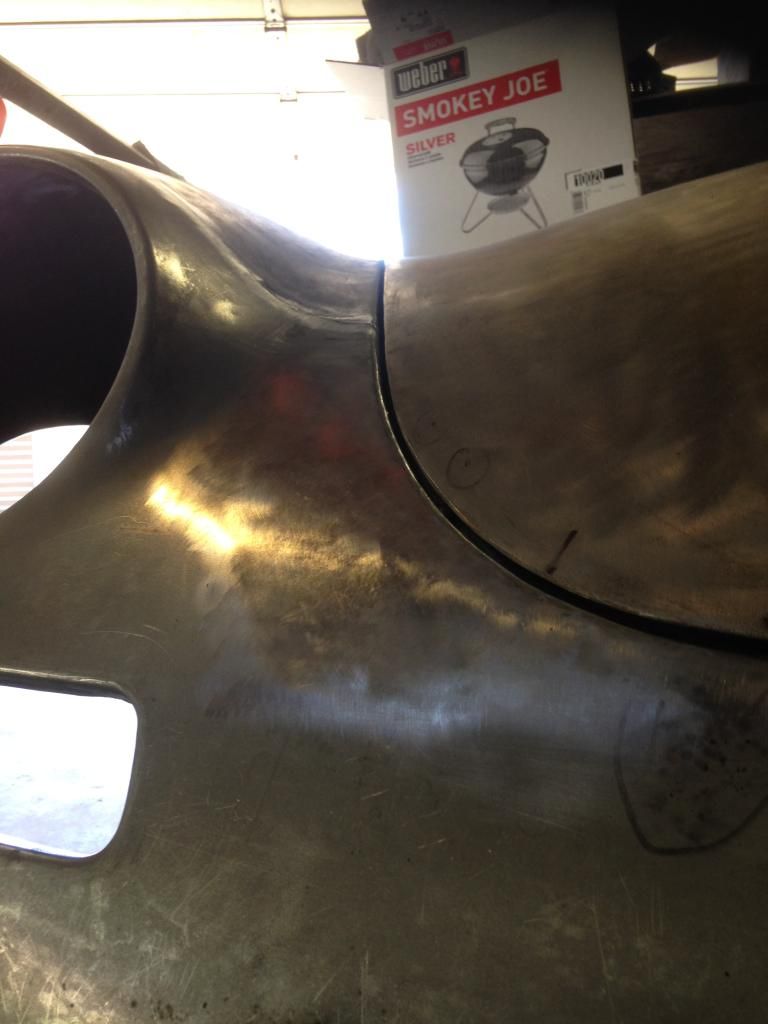
    Here's my attempt to take a picture and hold a straight edge at the same time. This is the old nose.

    Click image for larger version

Name:	IMG_6064.JPG
Views:	106
Size:	54.6 KB
ID:	45744

    Click image for larger version

Name:	IMG_6061.JPG
Views:	96
Size:	59.7 KB
ID:	45745

    The new nose has a much smaller gap that I can live with.

    Today I hope to trim and tack this in.
    Thanks,
    Tom

    Comment


    • Well, I'm happy to report that the right nose is now on.

      Only tacked in every 3" or so, except the center seam is almost fully welded.


      The hood gap is going to need lead of course to make it perfect and I'm still not done manipulating the hood some too. Also the entire lower nose flange needs to be straightened an re-bent when the car is turned upside down. Currently the SM nose is bent about 1" too low. So I need to correct that to match the left nose half.

      But....I'm really happy to have the hardest part behind me. The remaining welding will be a walk in the park.

      Cheers!
      Tom

      Comment


      • Nice job, Tom. Your fitment is spot on. TIG or MIG spots?
        jjgpierce@yahoo.com

        Comment


        • Tom

          Really looks great. Nice set of close up pictures.

          Phil

          Comment


          • TIG

            Comment


            • Congratulations Tom! The hood fitment against the new nose looks really good. Of course as you say there is still some very fine tweaking yet to do as it goes but the heavy lift of this repair is complete. I can identify with your relief and sense of accomplishment after finishing such an invasive repair. Nice job! Good seeing you at Dana Point!
              Justin
              Justin Rio

              Comment


              • Justin, John, and Phil thanks again for your comments.

                This repair albeit not finished is the last one! I have a laundry list of small nagging items, so I'm not going to lock up the welder yet, but my metal work phase is almost complete. Too many years for sure, but I'm looking forward to the next phase! Probably leading the gaps and painting the chassis.

                As always thanks for your support and reading my posts.

                Justin, I wish I could have stayed longer and talked more. I would have liked to meet Dean too. Maybe soon.....my son got bored climbing all the trees.

                Take it easy,
                Tom

                Comment


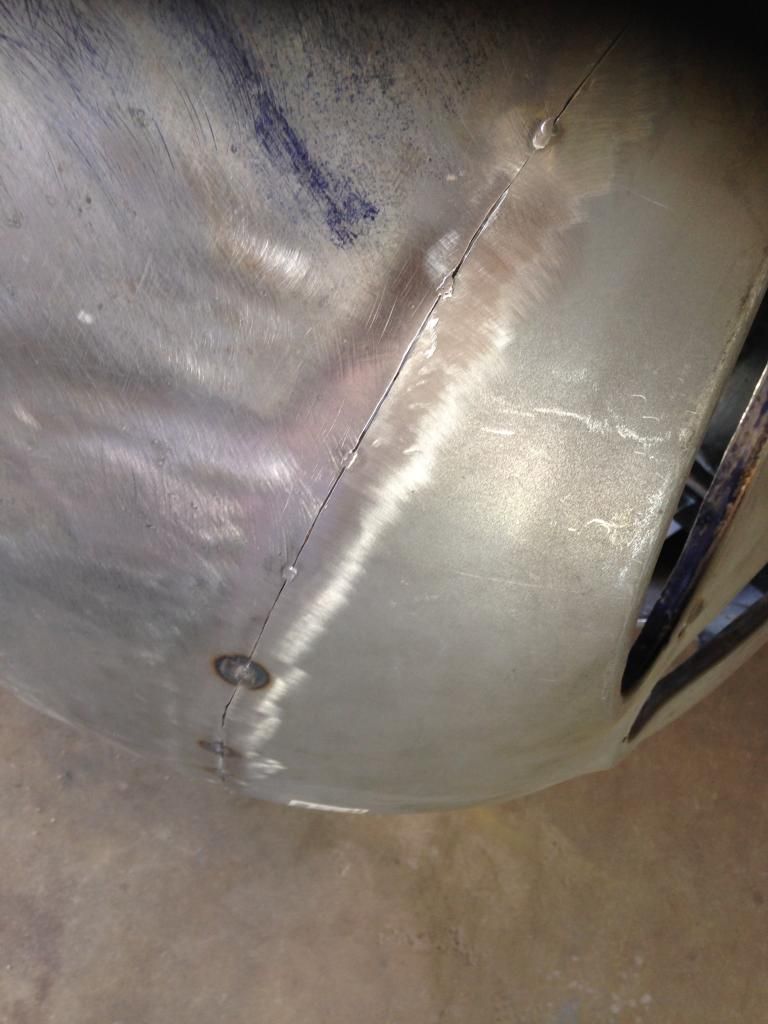
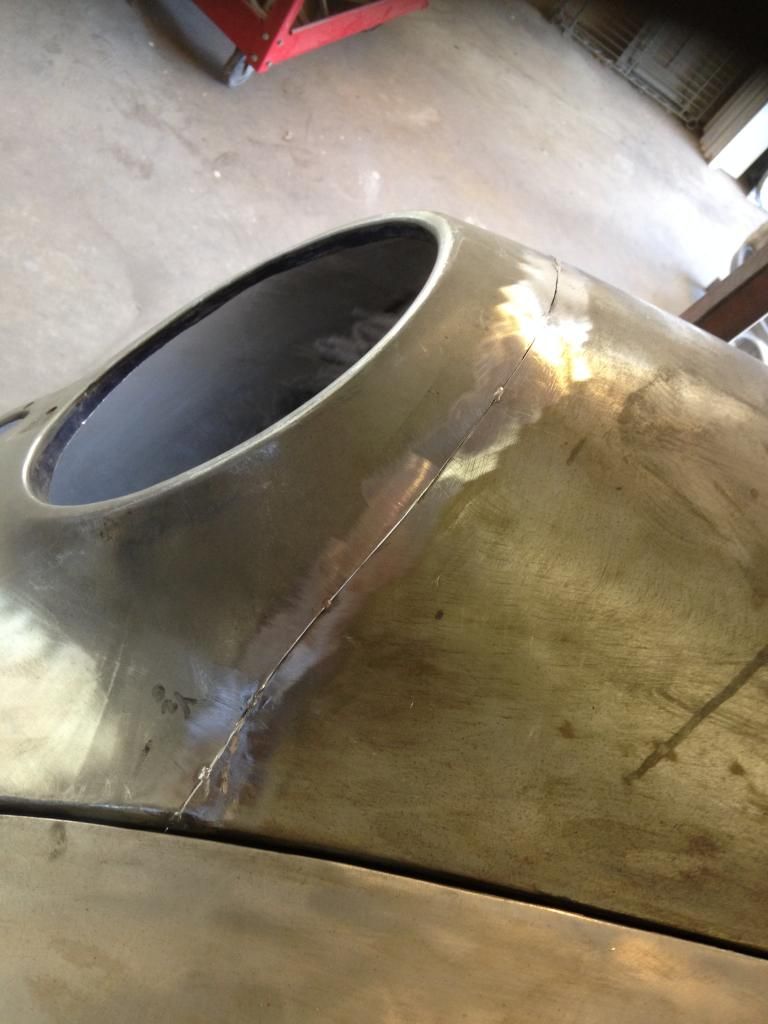
                • Nose is completely welded, except for a little section on the bottom remaining. Once I'm ready to rotate the car upside down, I should be able to do a better job when I'm comfortable.

                  Click image for larger version

Name:	IMG_6610.JPG
Views:	91
Size:	49.0 KB
ID:	46436

                  Click image for larger version

Name:	IMG_6611.JPG
Views:	85
Size:	46.4 KB
ID:	46437

                  Metal finished.

                  Click image for larger version

Name:	IMG_6632.JPG
Views:	93
Size:	52.6 KB
ID:	46438

                  Click image for larger version

Name:	IMG_6631.JPG
Views:	97
Size:	60.6 KB
ID:	46439

                  Click image for larger version

Name:	IMG_6630.JPG
Views:	92
Size:	55.3 KB
ID:	46440

                  Click image for larger version

Name:	IMG_6619.JPG
Views:	90
Size:	52.3 KB
ID:	46441

                  Still more to do on the hood seal flange. Remember that a large section was removed in order to tighten up the bends and make it fit. So that will need to be spliced in soon.

                  Thanks for reading along.

                  Comment


                  • Looks great Tom! what was your approach to welding the seam? Curious to learn. Also interested in knowing how much hammer and dolly work was required to get everything nice and smooth.

                    Thanks for sharing,

                    Joris

                    Comment


                    • Wow! Fantastic work, Tom. I see that you TIG welded it in short ~10mm welds. Did you use any heat absorbing/dissipating material to help control the warping?

                      John
                      jjgpierce@yahoo.com

                      Comment


                      • Thank you Joris and John....I'm happy with the way it came out

                        Here's a quick run down of the process.

                        In my opinion the panel fit is the most important step and where about 80% of my time was spent on this repair. I try for zero gap, but it ranges from 0 to 1/16" in some places. If the gap isn't good and the panels don't fit well cold, then its difficult to keep the weld and heat input consistent.

                        Once everything fits I tack the entire panel top to bottom to ensure nothing moves during welding and the gap doesn't change during welding. If the gaps change, then its time to stop and stretch the last few welds until everything goes back into original shape. So yes, hammer on dolly technique used during the welding process.
                        Weld length varies from 10-20mm and I skip around to whatever gap/offset looks the best.

                        I try to keep the blue area affected by the weld even (about 3/4" wide)to control distortion. Sure, it will still distort but at least its even.

                        I didn't use any heat absorbing material or backup plates during welding. The access to both side of this nose seam was great, so I let it shrink and then hammer stretch it back to original. I've never tried the heat absorbing stuff. If the heat sinks into another material then more heat needs to be added to weld puddle to get the same penetration, no? Others use those materials successfully without a doubt, but for me its another variable that I don't want. If access behind the panel is poor than I see a bigger advantage.

                        To smooth out the weld seam, I grind any high spots down first. This may sound strange, but I use a cutoff wheel on a die grinder for this step. Its light weight, had great visibility with the guard off, and I can use my knuckles/fingers as a fulcrum.

                        Most of the final weld flattening is done with a file. I used to use roloc disks, but they contour to the shape of the weld and too much material is removed next the weld and not enough of the weld.

                        Filing shows any low spots and distortion, so more hammer and dolly time is needed until its perfect. I alternate between the die grinder, file, and hammer dolly until its good enough.

                        Hope that helps. Everyones technique is different for better/worse??? I've had lots of practice on this car that is for sure. I still think the rear seat pans were probably the hardest for me.

                        Thanks again,
                        Tom

                        Comment


                        • Killer Tom!
                          trevorcgates@gmail.com
                          Engine # P66909... are you out there
                          Fun 356 events in SoCal = http://356club.org/

                          Comment


                          • Really, really nice work Tom. I would have liked to have spent more time with you at DP, but you kinda disappeared. Don't hesitate to contact me if you have questions as your project comes more in to my field of expertise. That goes for all in the 356 community. All you guys that I call "the welders" are amazing. Thanks again to Justin for hosting this open site, and all that contribute!
                            Jack Staggs
                            1321 #N, Calle Valle
                            San Clemente, Ca. 92672
                            949 492 9606
                            ifix356@juno.com
                            Jack (analog man from the stone age)

                            Comment


                            • Jack, forgive me for my ignorance. What is DP and you don't mind me asking (of course for selfish reasons
                              jjgpierce@yahoo.com

                              Comment


                              • Sorry. That would be the recent 356 Club concourse at Dana Point.
                                Jack (analog man from the stone age)

                                Comment

                                Working...
                                X