Announcement

Collapse
No announcement yet.

SC Coupe Restoration

Collapse
X
 
  • Filter
  • Time
  • Show
Clear All
new posts

  • Thanks guys, here's a picture of the tooling.
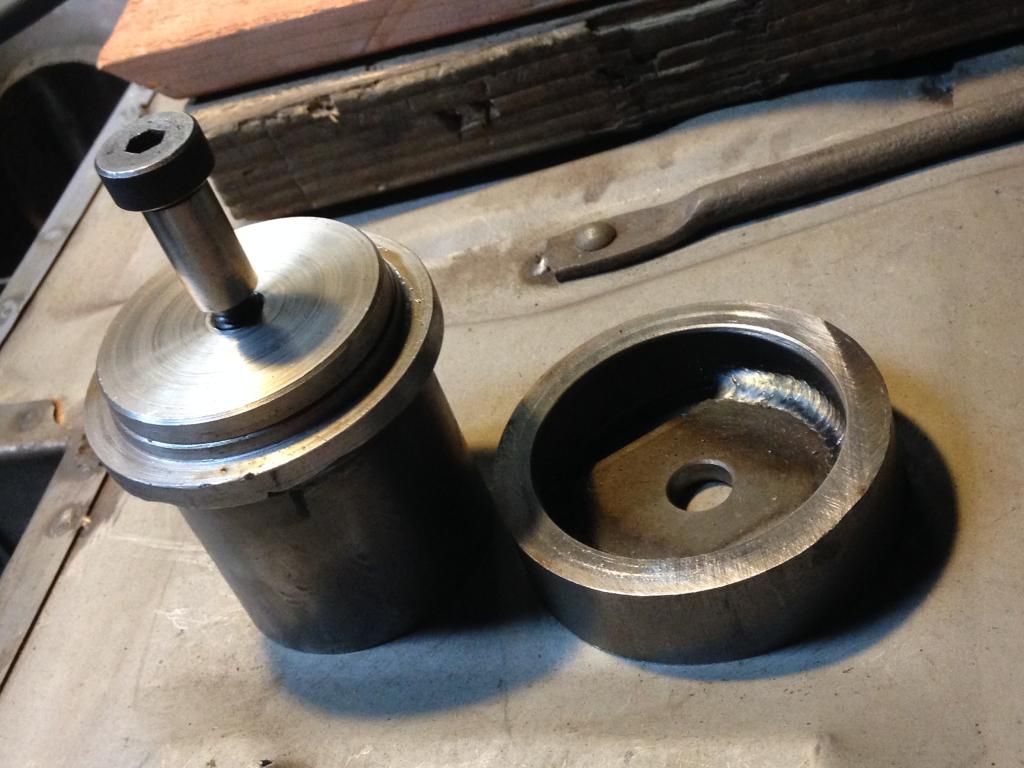


    The hat section slides on the shoulder bolt and the whole thing goes into a press to create the ridge.

    The holes and blanks were cut with a CNC plasma cutter. The rolled plug flange is a fake and was welded and brazed together. Tricky, but good enough to fool just about anybody.

    John, I thought of your project when working on my car today. After rotating my car upside down I took this picture for you. I hope it helps, but it sounds like you and Phil already figured it out.
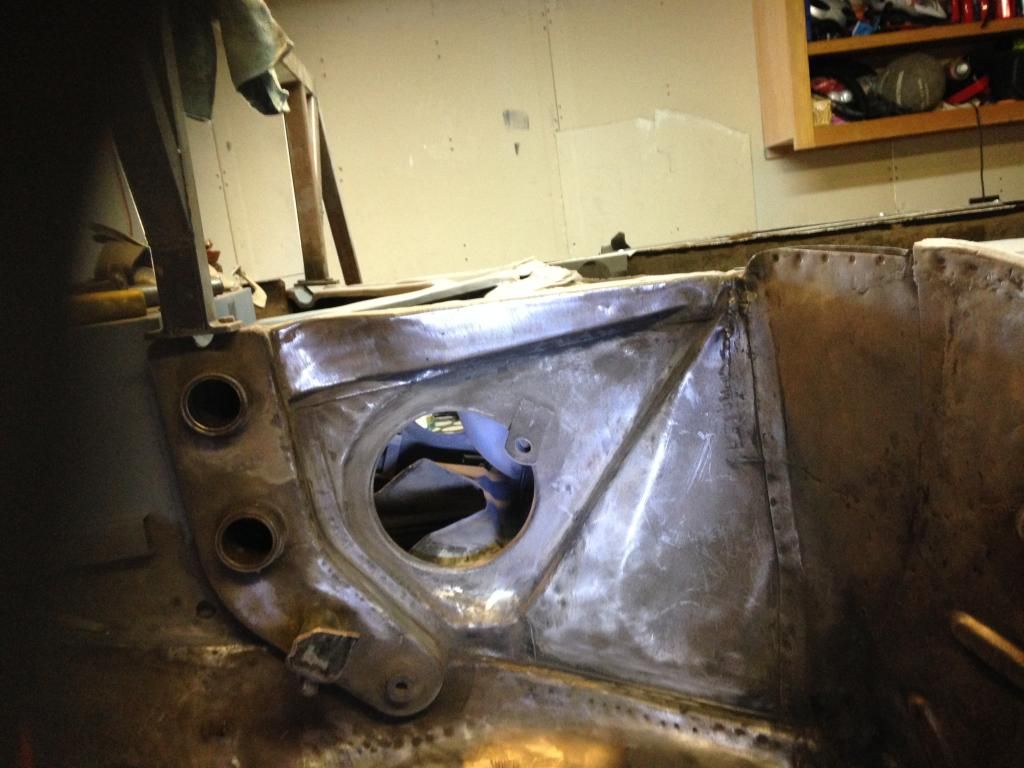

    Thanks,
    Tom

    Comment


    • Very cool Tom! Pretty weld bead down in that hat!!! Doesn't get better than that! I need a TIG...
      Justin Rio

      Comment


      • Originally posted by JTR70" post=21201
        Very cool Tom! Pretty weld bead down in that hat!!! Doesn't get better than that! I need a TIG...
        Ha I tricked you, that was done with my MIG!

        Comment


        • You sure did, that looks like certified welder type beads; Nice!
          Justin Rio

          Comment


          • Seriously cool!

            Comment


            • Thanks guys,

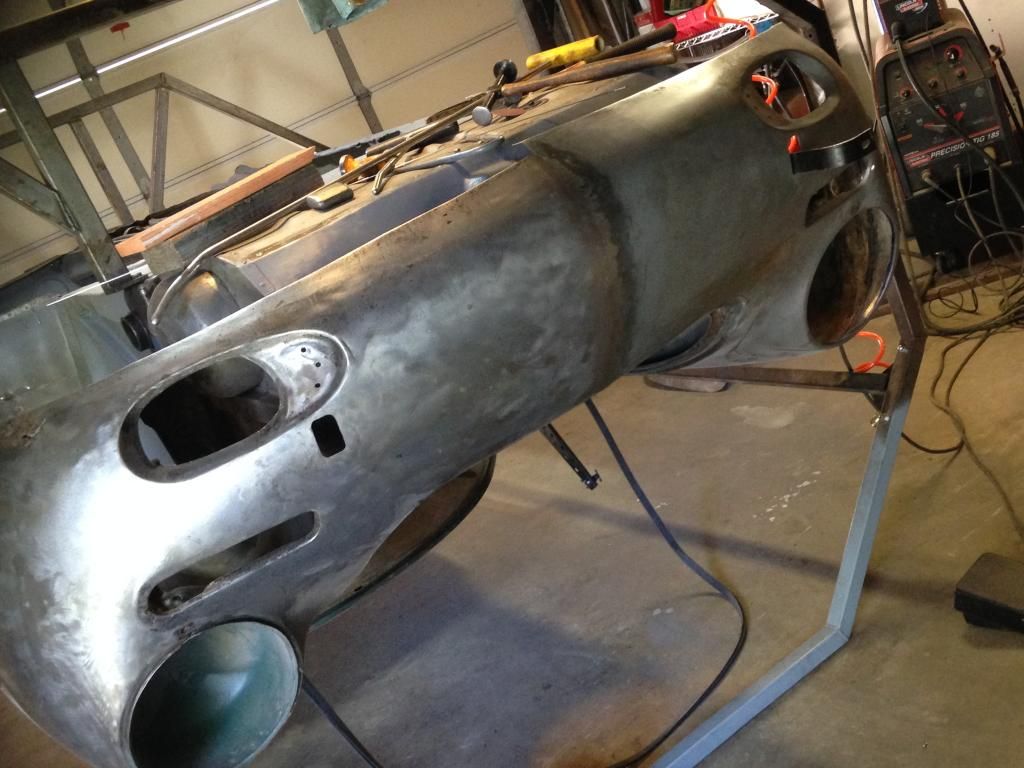
              Here's the center seam finished up. It took way more time than the seam near the headlight because access behind was not as good.

              I used some paintless dent tools and some handcrafted pry tools to apply pressure to the back side to correct welding distortions.


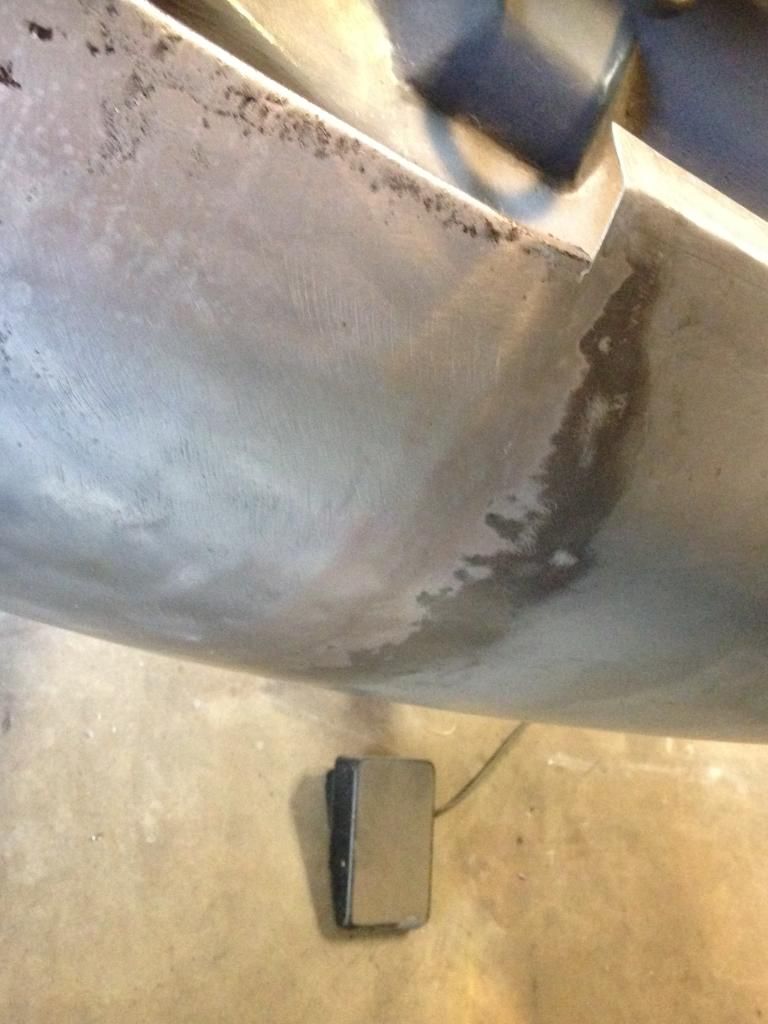
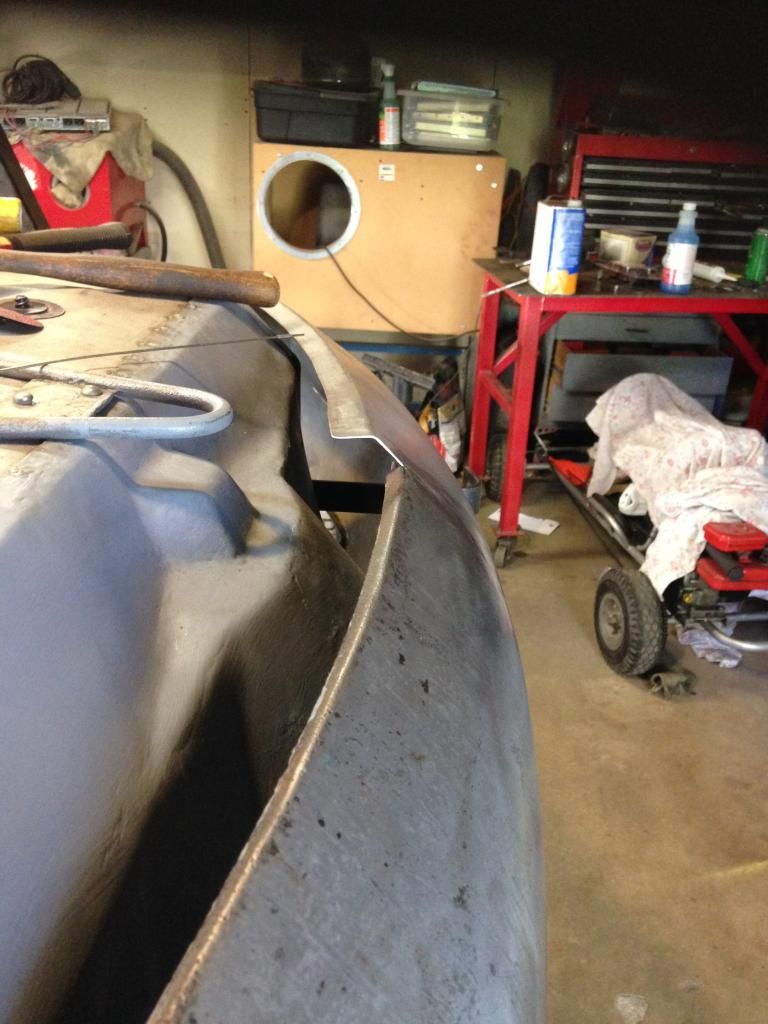
              Rediculous fit on the lower flange from Sierra Madre.

              The wheel opening side is bent short which is probably worse than the middle since material will need to be added!

              Wish me luck!
              Tom

              Comment


              • Wow! That's quite a step off. I hope the other vendors aren't like that. Stoddard sells a Porsche Classic Parts full nose assembly for only $3,000. Crazy $$. Trevor sells a nose for 1/2 that price. Steve doesn't sell noses for the newer cars. Not a lot of choices.

                Your TIG weld looks nicely done. Another step closer.
                jjgpierce@yahoo.com

                Comment


                • Amazing how off that lower section is compared to the original. I can imagine the poor guy who buys a complete front nose with nothing really to compare its accuracy to and just hangs it right on his car without question. Then you'll see it at a show and the car just looks off for some reason; you can't quite put your finger on as to why but it just does. Tom, maybe its just an illusion but how does the lower fog light look against the original side. Symmetrical?

                  John, if the nose for 3K is accurate I'd step up and buy one. Buy the best and cry only once as my mentor used to say...
                  Justin Rio

                  Comment


                  • "John, if the nose for 3K is accurate I'd step up and buy one. Buy the best and cry only once as my mentor used to say..."

                    Stoddard sells the Porsche GRV part for a retail of $3,700 and change. Add shipping and it's almost $4k and the advice above is STILL valid...but I will be calling Porsche with the part number on Monday, as the shipping is by dealer van, to my door...inspected prior to paying.

                    If that T-6 part is equal to the Porsche A version I've seen, it's worth the bucks.

                    Back when my shop rate was $25/hour and NOS noses were still reasonable and somewhat available, Chuck Stoddard had the T-6 version made in Michigan, along with a hood that was made to be both T-6B or C. They were e-coated and looked very 'original.' However;

                    I had detailed records of installation of both done in my shop and the Stoddard repro 'nose', while looking very nice by itself, took an average of $900 more in labor to 'get right' than a Porsche NOS part. That just 'went on' in a very direct way, no 'slice-n-dice', no wedges taken out or added, no reforming a curve or fighting a headlight bucket fit.

                    I called Chuck and asked if anyone had complained about the 'differences' and he said no. I then asked Brad, who worked for Chuck by then, how many they had sold and he answered "a few." I asked how many had been installed in the Stoddard bodyshop and he answered "none." ("The things that make ya go hummmm.")

                    I have a left and right of the latest "Stoddard's own" T-6 nose parts (likely resold by Sierra Madre) and whoever made them 'forgot' most the gutter. I will order that specific part from Restoration Design, as the car that is here now needs it all from prior bad overlay of several crashes ago, so a 'quilting' will make it OK if Trevor can't supply one in a timely manner since my order last week, both sources about equal in total price and slightly more in labor for the multiple parts assembly.

                    To be fair, Stoddard Parts has no bodyshop and QC would be out of the realm of most parts salespeople.

                    As for efficiency for a 'best deal', those parts from Stoddard and Resto-D would be assembled after 'correction' on the car to be sure it all fits and overlaps fastened with tek screws, Clecos or spot welds, then welded 'on the bench' and metal-finished before installing for spot-welds and side seam hammer-welds.

                    Problem is, I'm dying to know the quality of the GRV Porsche part but know no one who has used one...thus the plan to buy one and see if it's like 1978 all over again.....what's the best result for the least amount of money.

                    BTW, a survey done in the shop in that era, when the cars we are restoring now were called 'parts cars' (but the rust and damage wasn't that much different)....for a "Floor Job" from battery box to rear engine tray and rocker to rocker..it averaged 140 shop hours, not including R&R of what was in the way, repro floor parts or paint (or adjacent body rust repair). FWIW, I think the high was 175 hours and the low was 120.

                    I continue to be very impressed with the work presented on this site. It is most gratifying to see others who really like this type of car and this type of work get such great results. I'll say here that even I do not do it for the money, as it is very difficult to bill every hour that's put in to such unpredictable work and you have to love it (or at least like it a lot).

                    Comment


                    • Bruce,

                      Thanks for sharing your experience. You're correct: the Stoddard full nose sells for $3784 without shipping. Yikes! It looks mighty nice though I totally agree with you about the necessary work to make repro parts fit. I'll give Stoddard a call on Monday and get the low-down on the Porsche Classic Parts nose.

                      Click image for larger version

Name:	644-503-011-06-grv-pic2.jpg
Views:	80
Size:	25.9 KB
ID:	47853

                      Click image for larger version

Name:	644-503-011-06-grv-pic1.jpg
Views:	81
Size:	45.4 KB
ID:	47854
                      jjgpierce@yahoo.com

                      Comment


                      • Hi John,
                        Have been following your progress. Not much time to write though, busy with work.

                        Good job on the battery box area. Nice to get a little area buttoned up, huh? For the longitudinal/toeboard/front strut repairs, I'll offer my two cents worth. For a car thats as buggered up (Bubba'd up?)to start with as yours, I'd suggest fixing the longitudinals first, then make the connection to the battery box/front beam area. There should be no elevation change in that entire flange, from front to back. So if you can work out at any point where it should be, then its just a matter of a big straightedge (a big piece of angle iron!)to locate the rest. After that done, do the toeboard area repair between your longitidinal flanges, which is also a straightedge, but at a slightly lower elevation than the longitudinal flanges. Then the toeboard flange elevation locates the the tunnel flanges at the front.

                        Its ancient history, but I posted a bunch of pics of my efforts with 104006 on the R site several years back. Some of those photos might be of use to you, so here is a link:

                        http://forum.porsche356registry.org/viewtopic.php?f=4&t=20706&hilit=104006

                        There are some photos on page 3/4 of replacing the entire front inner fender with a NOS piece, and making the toeboard/tunnel repairs.

                        As for noses, I bought a Trevor nose for my T5. Though I know Justin is not a fan of Trevor's parts, I was OK with it. It is not perfect. Required quite a bit of work, particularly around the right side of the hood opening. But overall I thought it was not too bad. At the time I bought it, I was sort of kicking myself for not going with two Stoddard repro halves, but after seeing Tom's adventure, I'm feeling better about my decision.

                        Take care,
                        DG

                        Comment


                        • Tom, my guess is that the mis fit at the center is only the last 12 to 15" a fairly easy trim and rebending of the flange. Better than too short! Could you show a pic of the other problem area at the fender? I've never had a nose panel fit perfectly, new, used, repro... Seen original cars with fender stays mounted differently from side to side tho. I have had reasonably good luck using headlight buckets and surrounding area from VW front fenders, more so on pre t5. Later cars require more darts on the top to fit. Always a good fit for the headlight and body gasket. Damaged OG VW fenders with good buckets can be had for up to $35. Maybe this will help someone...
                          J
                          Jack (analog man from the stone age)

                          Comment


                          • Thanks for posting the Stoddard pics John. The drip rail is formed much better than the panel I got. I can see the same strange bump on the fog light cutouts. Not a big deal to correct that.
                            The flanges that return inward look more accurate than mine were. It just depends how you value your time versus the upfront cost.

                            I agree that any panel you find will need some tweaking. Best to keep your originals or reference a known good car.

                            My fog light cutouts are symmetrically placed from the centerline and from the floor. However the angle that the nose rolls under towards the ground is not the same from side to side. My picture of the center seam was taken on an angle and makes everything look a little strange. Also the original side looks like it has rust holes in the picture, but it does not.

                            The entire bottom flange needs to be tuned up and contoured correctly so both sides are the same.
                            Jack is right that the bottom flange is mostly off near the center. I don't have a picture of the fender side but will take one when I return from vacation. It's almost like the nose slipped in the tool when the last flange was bent. The fender side will need about 1/4" more material to wrap the wire edge and transition to the flange.

                            Will definitely post a picture if it when I can. Great tip Regarding VW fenders near the headlight bucket. That is one area of many that was buggered up on my original. If I ever do fix that nose part I will do it with a vw fender now....thanks.

                            I appreciate all the discussion. Despite all my problems I still think the smc part was decent and better than nothing.

                            Thanks for reading along,
                            Tom

                            Comment


                            • Tom
                              Nice work on that nose joint. Will be interested in your repair of the bottom flange. Good luck.
                              Phil

                              Comment


                              • Thanks Phil, I didn't sand this seam to make it look really nice like the headlight seam. Maybe when I finish the flange re-bend I'll take a nice picture for my records.

                                My plan is to plasma cut a thick piece of metal that follows the correct contour and temporarily weld it to the backside so I can hammer over it.

                                We shall see if that works or not. I can do it with a dolly, but my arms might fall off with such a long bend.

                                Take care,
                                Tom

                                Comment

                                Working...
                                X