 Tweet
Tweet
I'm pretty sure my shot bag was filled with #9 buckshot.
-
Justin Rio -
The next major milestone is the hood, which I've been reluctant to tackle because it's a big job. Over the several years this car has been apart a few extra hoods landed in my garage.
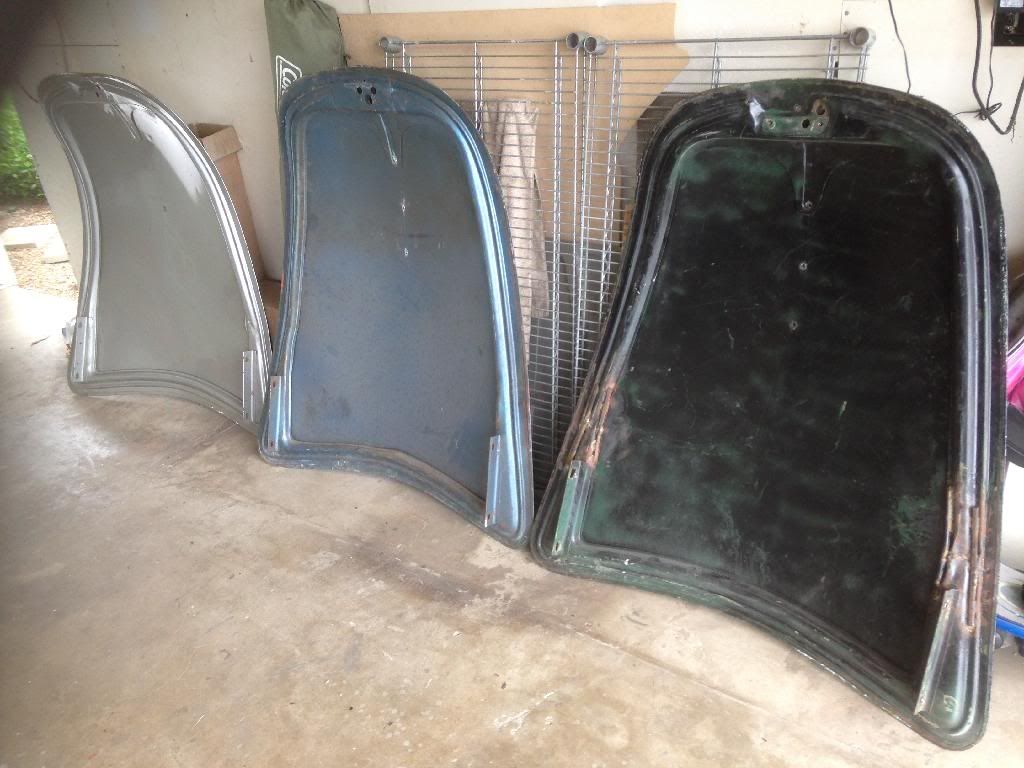
Door number 1 (closest in picture) is the original, or thought to be but there are no numbers stamped on it.
Door number 2 is the nicest one, but unfortunately it's for a T6B. I didn't realize that the latch area is different on the C
Door number 3 looks nice but it's buckled pretty bad at the nose.
Before parts prices went through the roof I was going to make one nice hood out of three, but now the reality is that is just throwing away money that I could spend on interior or paint. So I decided to fix my original and restore the other hoods after my car is in the road ??? Or sell.
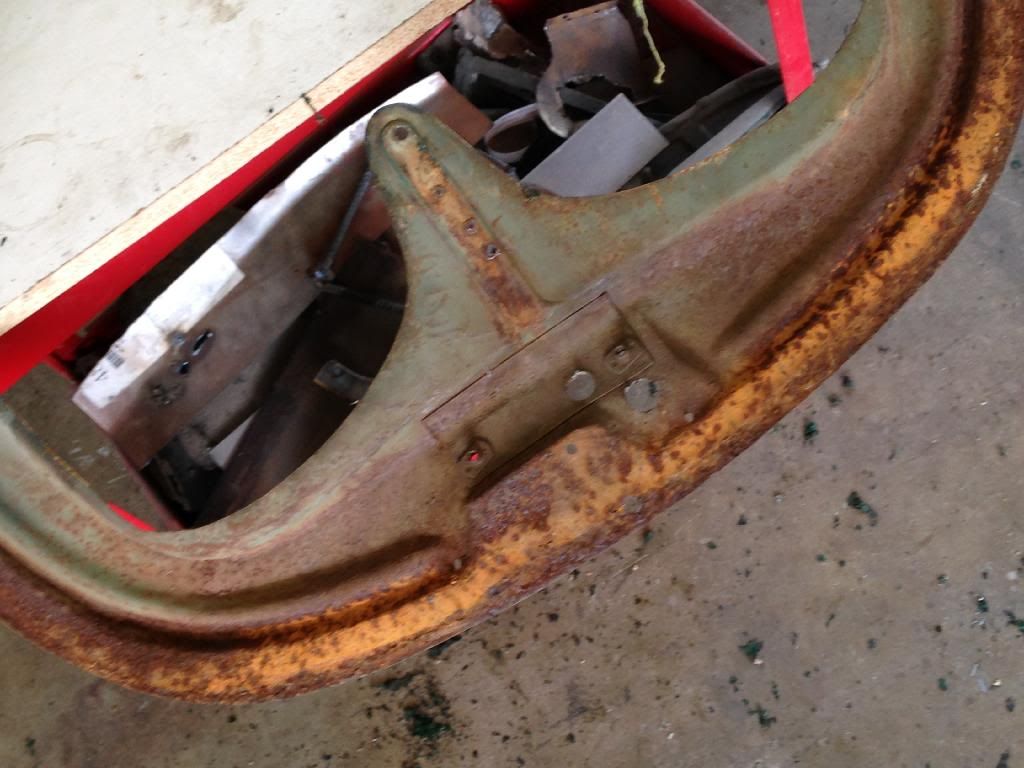
My hood was kinked and repaired.

Restoration design makes the corner portion of the frame, but I didn't find the rail section I need.
I ended up making my own, so stay tuned....this is going to get messy.Comment
-
Tom
Hopefully Bruce will chime in on this. I think he recommends removing the outer skin to get at the rust under the hem. If you are going to do that, you could remove the skin from the other C hood and use its frame if it is easier to repair. May be quicker. Then repair your bad frame later and the other skin. Or, with your great TIG skills cut and past your latch panel to the T6B hood.
PhilComment
-
Thanks Phil,
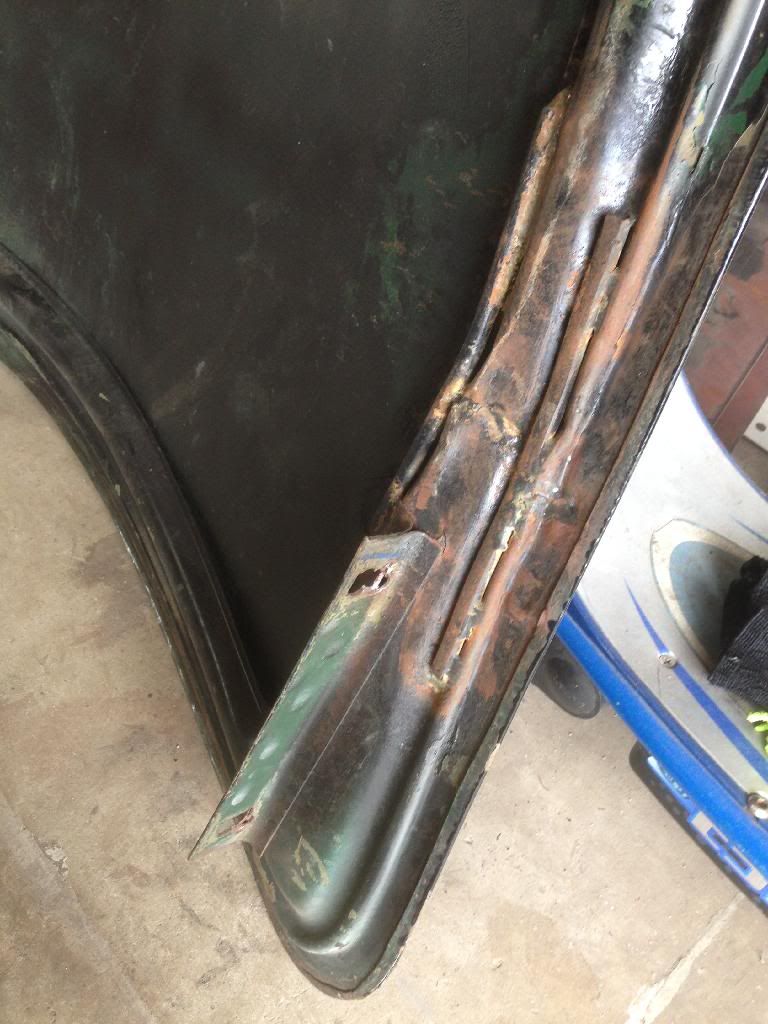
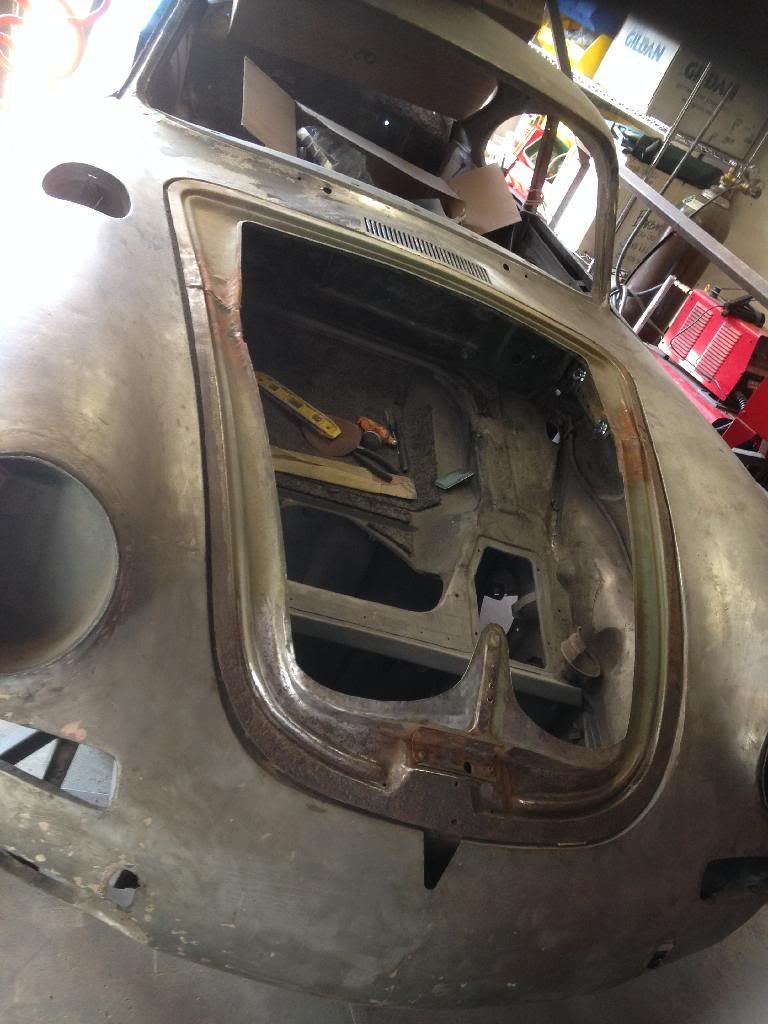
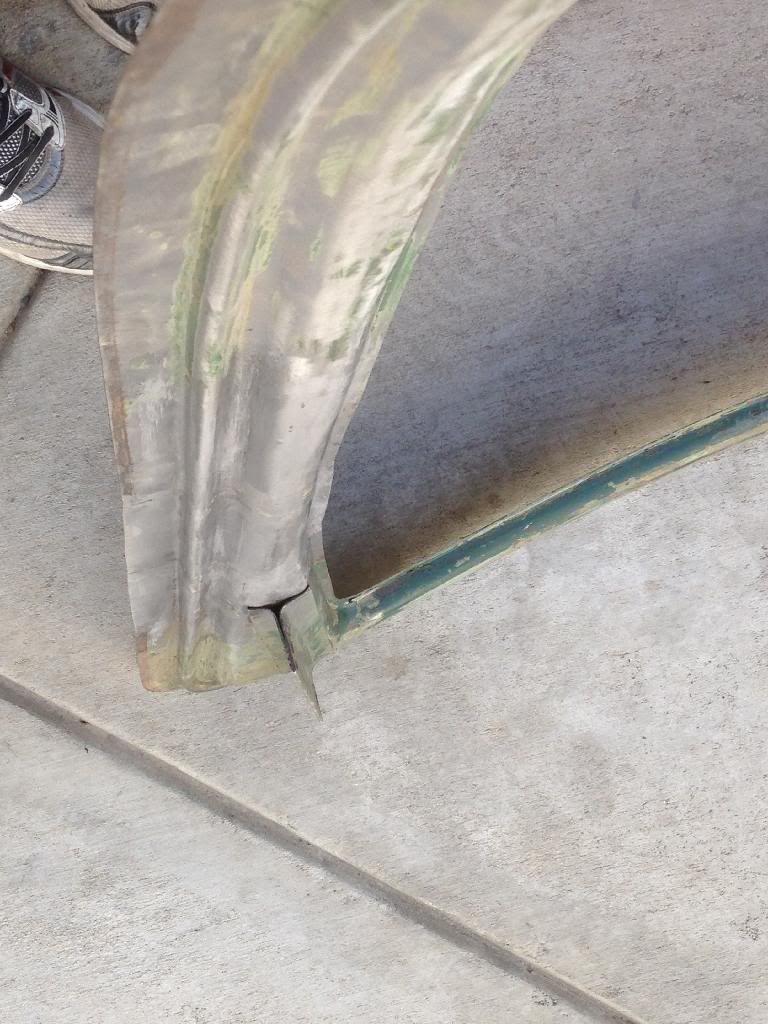
I agree with Bruce and yourself that the skin has to come off. In fact it's already off. Here's a picture of the partially opened hem at the rear of the hood. Since the hood narrows near the front the entire perimeter hem does not need to be opened all the way. I just slipped the frame out after drilling some spot welds near the hood handle.
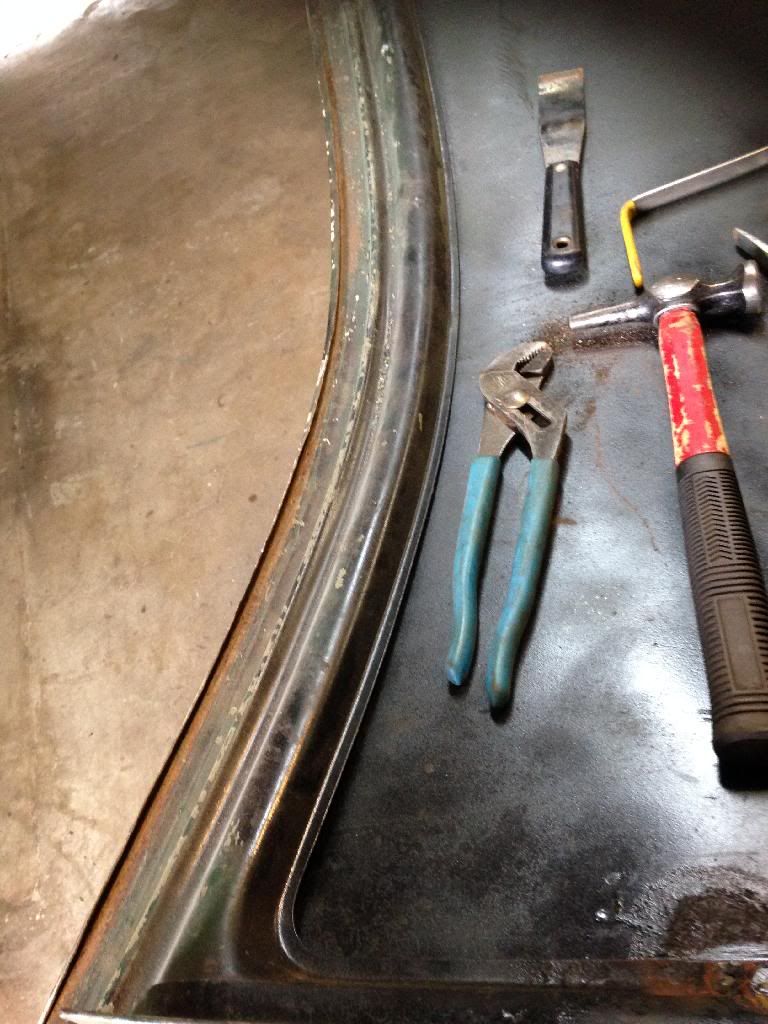
Disregard the pliers in the picture, They didn't do most of the work. Instead, very careful prying was done to prevent distortion on the top side of the skin.
Hello rust
Comment
-
Tom, has that BT6 hood ever been kinked? If its cherry I would swap the front inner structure to create the most pristine part possible. Those mount holes have even horribly hogged out on your old hood. Glad your getting ready to knock this out; my guess is your probably feeling better about getting it done as well? Justin
Justin Rio
Glad your getting ready to knock this out; my guess is your probably feeling better about getting it done as well? Justin
Justin RioComment
-
You noticed the holes too huh? Crazy workmanship. The brazed in rods really take the cake though. Bubba would be sooo proud!
I may steal the skin from the other hood, who knows. That one has one side slightly kinked, so I don't know if the skin was damaged or not.
Either way, I hope to end up with a cherry part once its all said and done. I have laid the hoods on top of each other and the skins are identical in size. The internal frames are slightly different near the hinge bracket too. They have a similar profile, but the C frame is a little bit flatter.
Yes, this hood is so happy to get fixed. It was the worst fitting part on the car and stood out like a sore thumb right in front of my driving view! (Drivers corner never sat flush with the cowl.) That frame hasn't seen the light of day in almost 50 years, so yes I'm happy to march forward now that its opened up like a can of worms.
Thank You,
TomComment
-
Man that kinked substructer looks worse and weaker from the inside. I believe Steve Hogue offers a repair section so you can splice in a fresh piece in there. Just a suggestion on the hoods; you of course know better than anyone else with them right in front you. Either way I have no doubt its gonna be nice in the end. The donor hood for that Speedster project I'm doing is also kinked. I have never dealt with a kinked hood before so like Phil I'll be watching this operation with great interest!
JustinJustin RioComment
-
Tom, thanks for sharing these pictures. Love your attention to detail and craftsmanship. Makes me want to go out to the garage and work on stuff.
Cheers,
JKComment
-
Thanks Tom also from me, I have often looked at the hood and wondered how you would start to repair one. Great site here top find out. My brothers 51 split screen hood came up at speed many years ago and I saw not only the kink in the lid but also the damage in the cowl under the windscreen. He had it repaired but he never showed me the car with the hood lid lifted again . I have always dreaded that problem ever since. So much so, I check the lid now so regularly.
Really watching this with interest.
RoyComment
-
Have you considered the new part from Restoration Design? Of course, there is always the satisfaction of knowing you did it yourself and spent countless hours making pigs crap look beautiful. That's what we all do . Post some more pics in case I have to do this bi#%*tch job on my car.
Mark Erbesfield
. Post some more pics in case I have to do this bi#%*tch job on my car.
Mark Erbesfield
57 356A
65 911
68 912
73 911S
66 Toyota Land Cruiser FJ45LV
79 450SL Dad's old carComment
-
Thank you all for the interest in my project. If some one is encouraged to get out in the garage and build something than posting pictures is worth my time!
Hi Mark, yes I did consider buying a repro hood , but my past experience is that it won't fit without serious modification anyway. I could be wrong, but I don't want to spend $1500 and find out the hard way. I'll sell the extra hoods and be $ ahead. Sure....time is money, but who's counting anyway?
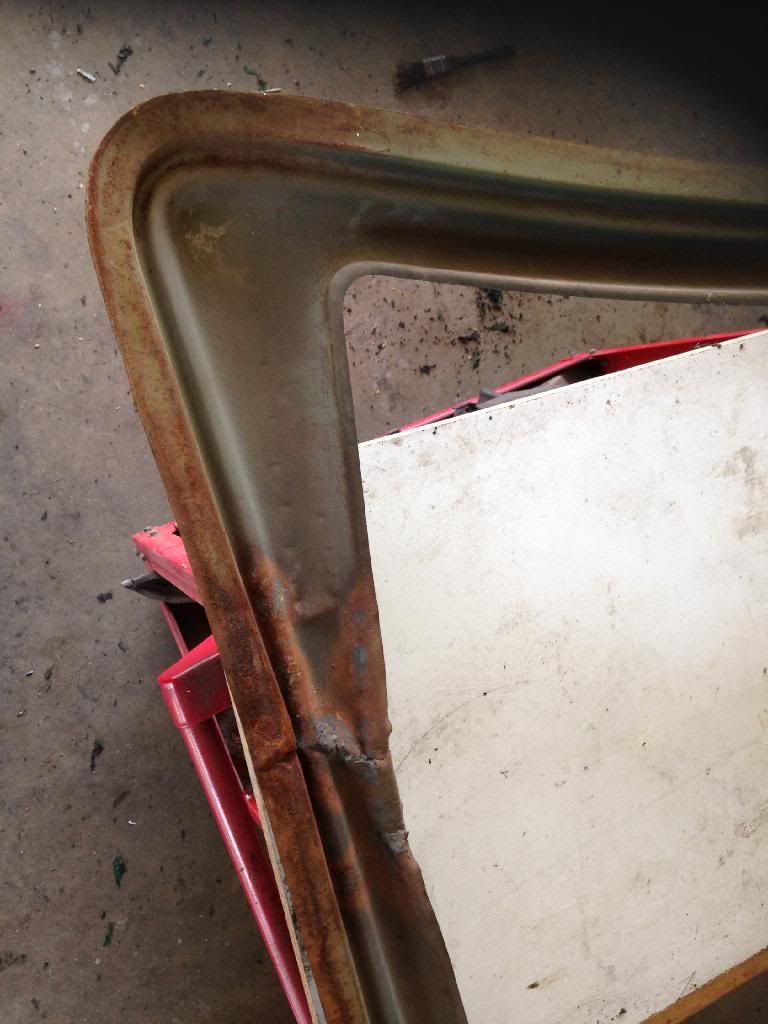
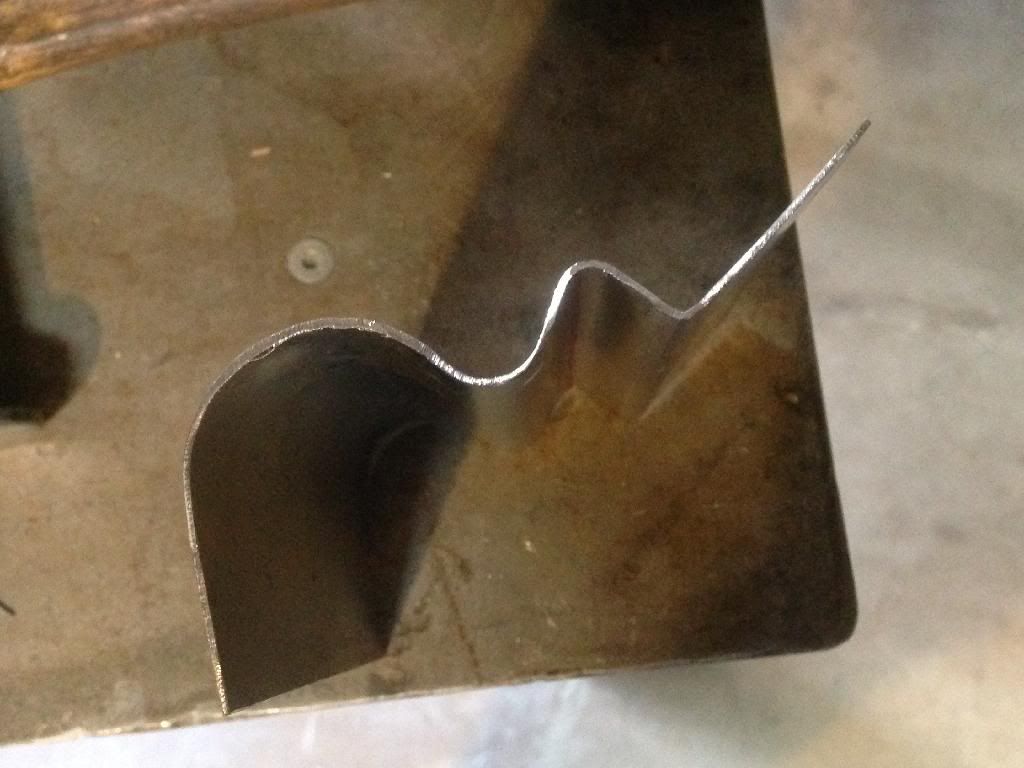
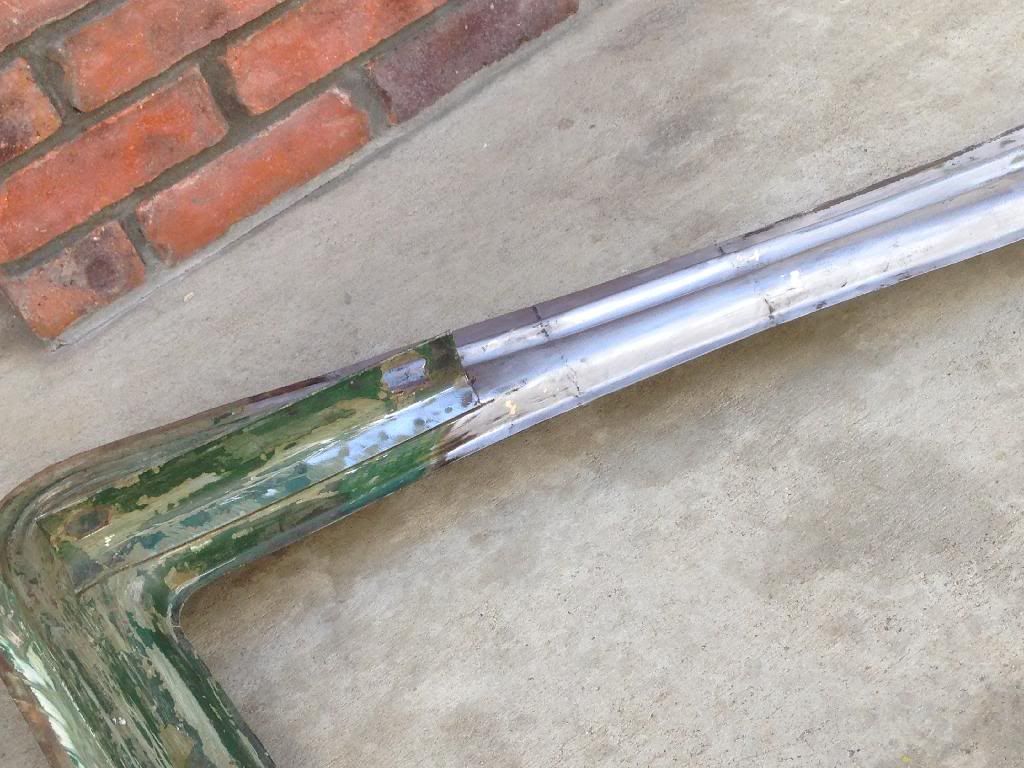
Here's a picture, before the splice goes in. Several measurements made before for reference.
Profile section complete except for the last bend. I always form the last bend once everything is tacked in place. This prevents accumulated error and the last bend is fairly simple.
More to come soon, I have four hours tomorrow reserved for 356 time.
Comment
-
Very interesting shot of your substructure mounted in position this is going to be very cool to watch. Fabricating your own substructure section; Nice! You da' man! Keep up the great work! JustinJustin RioComment
-
Thanks Justin, It's cool to see how the hood fits without the skin attached, plus removal and re-installation is really easy. I've already spent hours fixing bent hinges and hinge pockets to get this hood to fit better. Still lots of work to do, but eventually the elevation and gaps will be uniform before the skin even goes back on.
Today, I finished the splice on one side. A hidden gusset is planned, but that won't go in until I'm happy with the hood fit with the fenders and cowl. Some tweaking is still necessary to the hood frame.
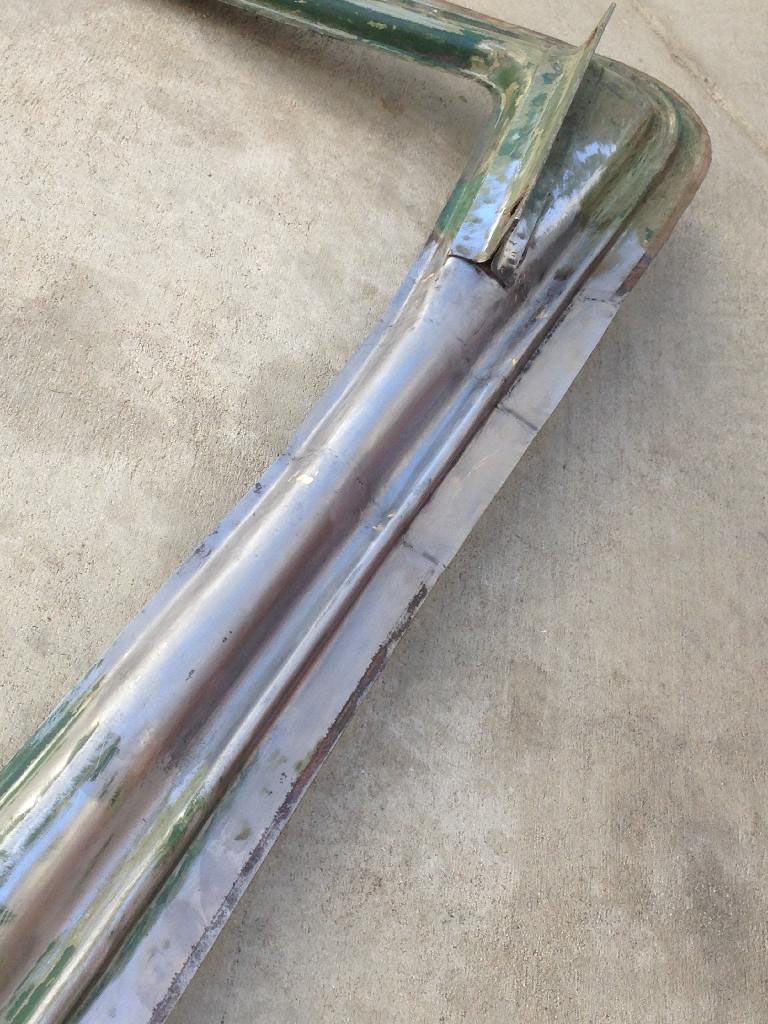

A little trimming is still need on the outer flanges. Lets hope the other side goes easier. Thanks for watching.
TomComment
-
Nice work. Buy 2 identical hood gaskets and use one to exactly fit the hood to get the gaps and blocking as close to perfect as you want. Use the second one for the finished product. Jack (analog man from the stone age)
Comment
-
Beautiful work Tom! BTW: what did you use as a form for your repair section? Jack is absolutely correct; the seal is so important. Keep up the fantastic work! JustinJustin RioComment


Comment