 Tweet
Tweet
Fingers crossed Tom. Looking good.
-
trevorcgates@gmail.com
Engine # P66909... are you out there
Fun 356 events in SoCal = http://356club.org/ -
Tom,
Very neat welding mods indeed !
Nice work.
RoyComment
-
Thank you Joris, Roy and Trevor for the nice words. This damn car has given me lots of practice that's for sure. My talent is soon to run out when the painting phase ensues. Check book ready, ha ha.
I gave up on the Eastwood pliers that never arrived. Tile nibblers are the next best thing or at least what I had.

modified

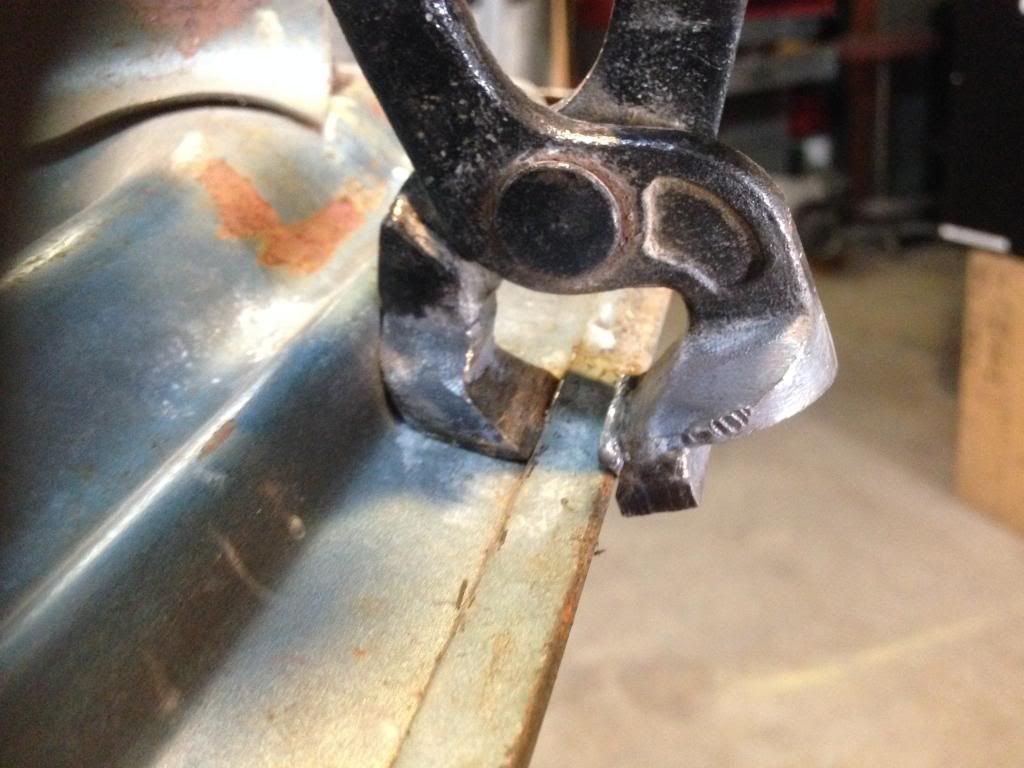
I found that its best to make several passes instead of just mashing it open. This way there is less distortion to the flange.
Not good news:
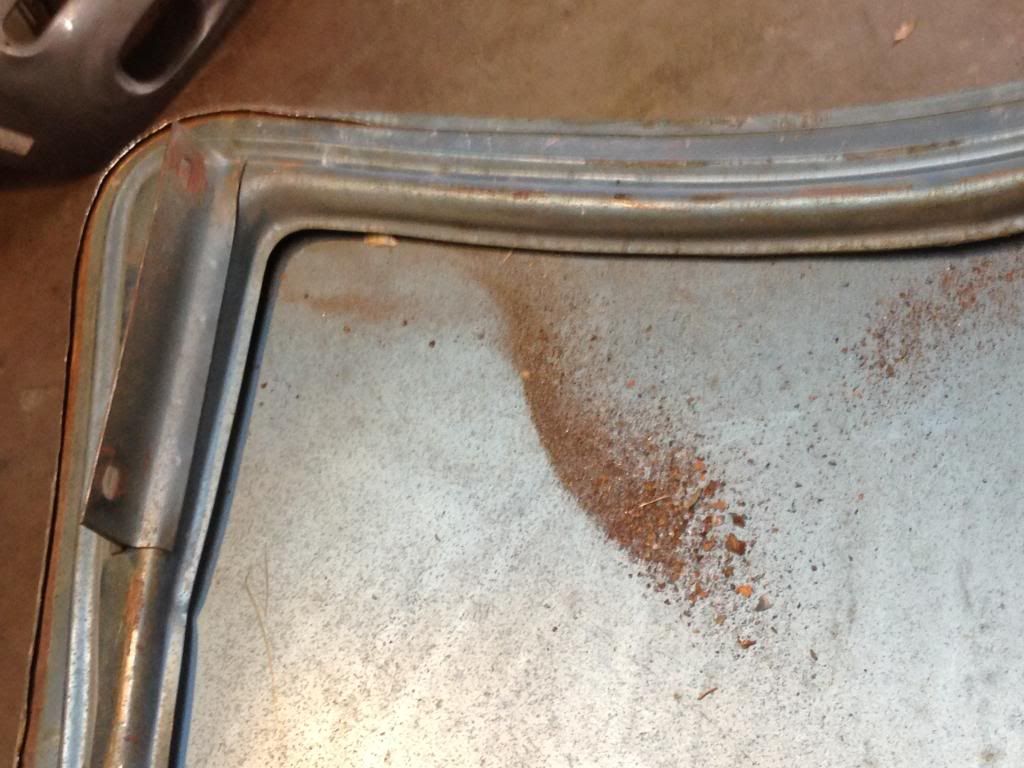
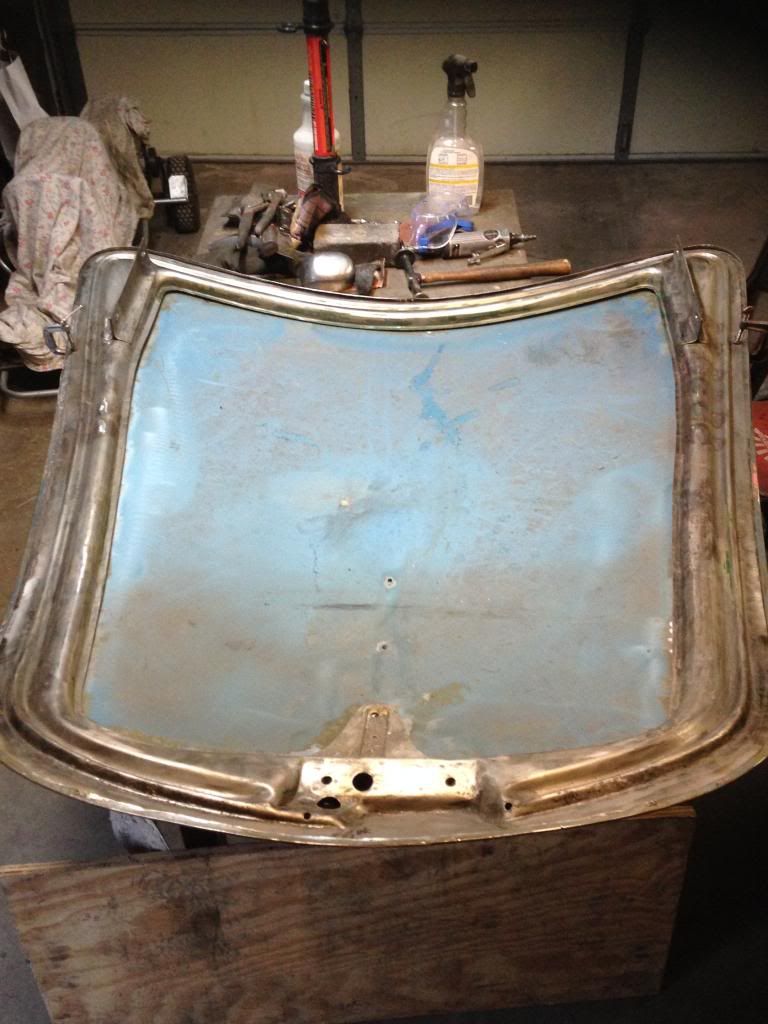
Success! Tempered by rust
Some straightening needed in the kink area. Easy to fix now that there is access.

Most of the rust has been cleaned away. My technique is wire brush followed by DuPont metal conditioner (Phosphoric acid) applied with steel wool. Then repeat again and again.
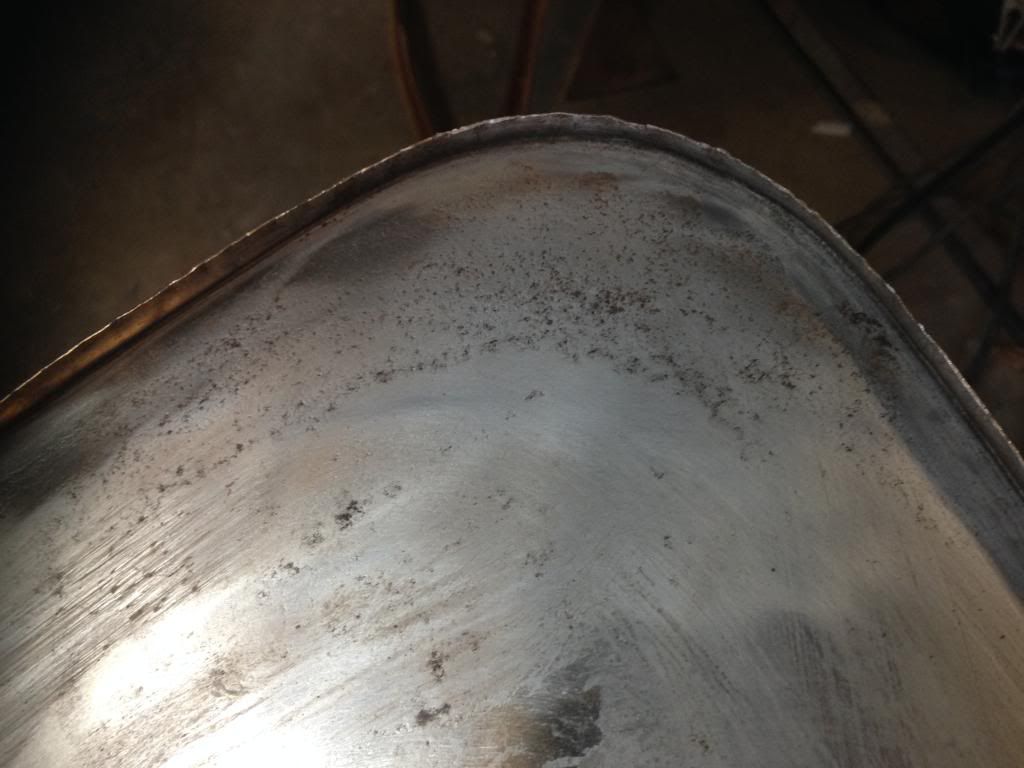
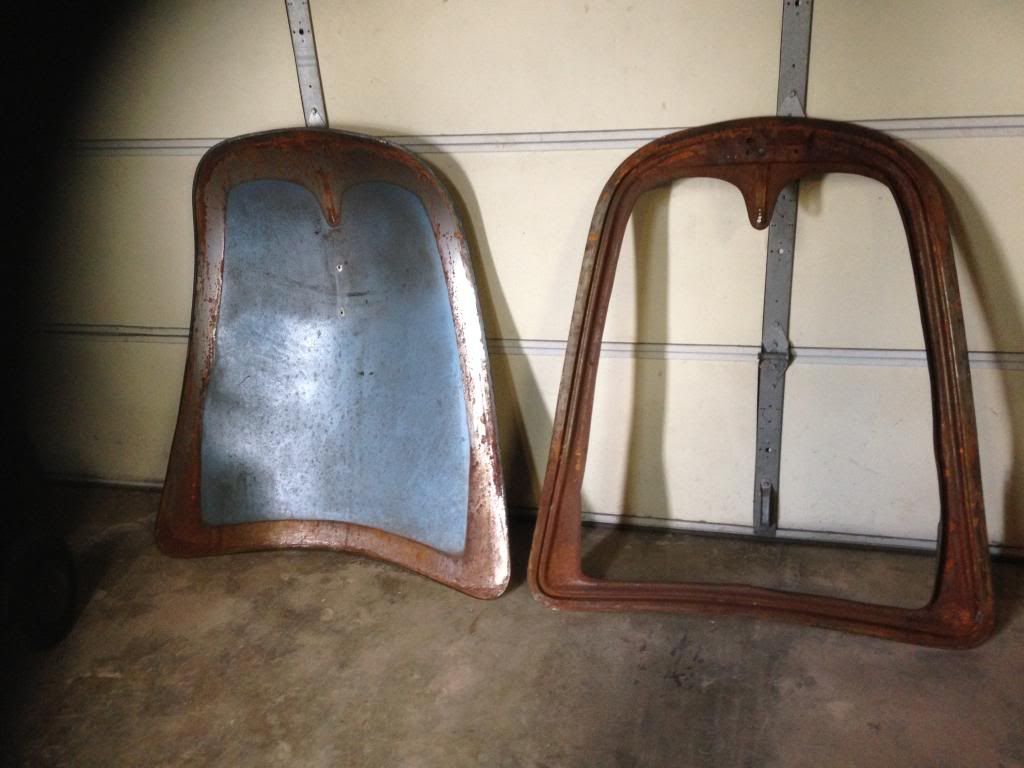
Here's the nose that has lots of pitting. The plan is to continue cleaning. I may fill a few deep pits with the TIG welder.

Overall this skin is way better than my original one. Later I will show the test fit with the frame.
Thanks again for the nice encouragement.Comment
-
Great pictures Tom, and nice tool. Can't wait to remove my hood skin.
PhilComment
-
Tom, Thanks for sharing what would normally be considered a very intimidating operation. Nice job on converting those tile nibblers too they seemed to work beautifully! Did you anneal the lip as Bruce suggested or did you just unzip this cold? This is really shaping up to be one hell of a repair! Looking forward to the next installment. Justin
Phil, you have a similar repair to do as well?Justin RioComment
-
Justin
Bruce has been kind enough to mentor me through most of the 12 years I have been working on Foam Car. First by email with attached pictures, then some of the Registry forum and now here. I have saved all of his emails(will send them to you Bruce when you write your book), in various places on 3 different computers. Way back he advised me that, "of course you will remove the hood skin to address the rust issues there" or something like that. I have not stripped my hood yet, but assume that when I do, there will be evidence of rust at the hem. So, yes, current plan is to remove that skin when I get the nose repaired. Right now I am leaving the hood untouched, as the hood fit was the only good one on Foam Car when I bought it. So, that will be my guide during nose re-install.
PhilComment
-
AW....
Phil, Tom, Justin, Roy et al.....this is fun. Learn an' teach and learn some more....WITH PICTURES!
I have to get back to the actual stuff being discussed, but I will offer that the pits go out back to the gravel lot with a small pressure pot of fine sand and get blasted...carefully....and THEN acid-etched.
Just my way over a 'few' years of doing such things.
Thanks,
-BruceComment
-
I envy you Bruce for having all the cool tools at your disposal. A spot blaster would be really nice and I've always wanted one. I even looked at one that has a vacuum attachment, but I still don't have one
At least I can brag that my hood skin removal tool is carbide tipped.
Justin, I ended up bending the hems cold. Sorry to hear about your roof diversion. Good catch though....or are you just trying to let me catch up to you? ha ha. Then you speed past me at the finish line Your car is going to be fast!
Anyhow, enough day dreaming.
My frame and skin fit together miraculously!
More fine tuning needed to reduce the gap between frame and skin as viewed from the inside.


My hope is to even these gaps without touching the skin. What do you guys see on your cars? 1/8 to 1/4" gap?
Thanks,
TomComment
-
Tom, the alternative without 'taking it outside' is a unit like this:
http://www.eastwood.com/speed-blaster-spot-blast-adaptor.html
(I use Eastwood as an example. It's local to me and I've known the owner, Curt Strohacker, for almost 40 years...before Eastwood was formed.)
I have a similar unit. It's used on the body parts that are stripped but show spots where they were bare and rusted and need to be 'deep cleaned.'
To answer the gap question, my experience is that the gap inside the lid is not-quite-touching to almost 4mm. I just checked an original car and it is closer at the hinge area blade (where I can just get a fingernail in) and at the curve toward the front it is about 3mm and then front center is close again, obviously VERY close where it is spot-welded. This one was never rusted, kinked or blown back and it has the 'right' look. (If I was logged in on IE, I could send a picture of several like that here...Firefox won't jive with this site for picture sharing.)
Anyway, gorgeous work that you and the others like Phil and Justin are doing and it makes my day to see work as good or better than my own (albeit I have limited time 'cause all these little areas can add up time-wise to a huge bill!)
BTW, I would not fill those pits unless perforated, even as you are a good welder. You will quite likely chase your tail with the heat, the various thicknesses, etc, etc. When blasted (with fingers crossed and without distortion) those areas get epoxy primed. All that matters is that the spot-welded areas are not primed with more than weld-through, if anything. Once fit to the opening, the lid is another panel that gets propped against a wall on cardboard and regularly turned so extra final 'juice' can penetrate all of that seam and drained via the holes for that purpose or laid down upside-down and mopped up as it runs out. You know, just like Porsche shoulda done it.....
Back to work,
BruceComment
-
Tom,
On my '65C there is about 1/8" but it's not too consistent because the hood has been kinked.Comment
-
Many thanks Don and Bruce for sharing your gap information! Super helpful and probably not in any of the books. Don, please ask if you ever need any measurements from me.
I did get mine within the ranges above after some serious wrestling. After losing several rounds, it finally moved the right way.
Back when I was splicing in the kinked areas on this frame the stupid thing fell off my table when it was in a vulnerable state. This most likely twisted the frame which is why I'm having trouble now.
Desperate times require new ideas and you might find this one funny.
The huge block pictured was made several weeks ago when I was matching the contour to the car. This time I sandwiched the block with another one below and twisted the hell out of it.

You can also see a big rubber hammer laying on the floor that was used frequently too.
Some finessing with the hammer and dolly was also used. Still minor work needed to take some of the waves out of the little flange and re-crisp some edges, but here is what I ended up with this afternoon.


The pictures make it look like its touching, but there is clearance in the tight spots and about 3 mm in others.
Tomorrow, I will try to mount it to the car to check fit again.
Thanks again for the measurements.
TomComment
-
Hi would it be too incorrect to use flexible body seam sealer in the gaps between the hood and frame This would have the effect of strengthening the hood more and if you remove a little bit on the visible edge side it will be almost invisible. it would also double as a moisture barrier preventing further rust
ArmandComment
-
Fantastic Tom! The block was a Very creative way of correcting the problem to achieve the desired outcome. Nothing funny or silly about it, This is exactly what I believe our build threads are all about; except for Bruce of course we are ALL just amateur hobbyist's with a passion for our projects armed only with the basic tools and our brains to get us past the next challenge our cars throw at us. The dream is of course to have an outfitted shop like Steve Hogue's but I'd have to sell all of my cars to afford all of those tools; then I wouldn't need the tools! We are regular guys hopefully showing other regular guys what can be achieved out in your own garage on a limited budget but with limitless passion and determination for getting things done. Okay, I'm down off the soapbox. The hood is really taking shape; keep it up!! Justin
Justin Rio
We are regular guys hopefully showing other regular guys what can be achieved out in your own garage on a limited budget but with limitless passion and determination for getting things done. Okay, I'm down off the soapbox. The hood is really taking shape; keep it up!! Justin
Justin RioComment
-
Hi Tom,
My hood to frame gap Measures between 2-3 mm throughout on an unkinked and unmolested hood. It is the only unmolested part on my car! Everything else is quite rusty. I really like your ideas on how to unkink these rust buckets. Very ingenious. I totally concur with Justin.
I don't think putting seam sealer at this gap would be good as the hood sheet metal needs to expand and contract. Water would have a hard time getting into the gap as it is protected.
JPjjgpierce@yahoo.comComment
-
Hi Armand,Originally posted by Impi" post=18997
The first thing I thought of after reading your question of sealer was of Phil's "Foam Car." We have all had thoughts of ways to better what Porsche designed but over time have paid for the consequences, so I, too, would say that's a good idea that shouldn't be tried.
Here's why; Tom posted "and twisted the hell out of it" about his shaped blocks and actually, that is still needed in the hood when 'finished.' The coachbuilders used 'some' spotwelds around the perimeter to keep from too much flex or separation, but not on the inside edge of the frame where it would 'lock' the shape to be too rigid. Only the front center is fixed when adjusted but even the hinges have some flexibility.
Flexibility to some degree is always needed. We adjust hoods laterally by one person pushing on one side and another pulling from the other side, sometimes using a board to help 'insist' and get the hood to just lay in place and then work with the forward latch in lateral and height adjustments after the curve is fine. Even that is a pry and muscle job(with finesse). The slotted holes in the hood's blades allow gaps to be established by averaging side angles, occasionally a 'hydraulic assist' is used to slightly widen the hood opening to get the even gap all around. I'll use a sandbag (not a bag of sand)to encourage the arc of a side, 'trial and error.' There usually is more twisting of a hood that you'd imagine to make uneven fender sides come to an acceptable average.
This whole dialogue is support for the term 'made by hand.' Even the rubber seal plays a part in fit. Fitting panels is for me right up there with Roadster/D windshields. Very difficult but do-able with patience and care, applying common sense to get from not fitting to fitting and sealing. "If I do this, what happens?" Planning and concentration.
BTW, I began when OEM parts were still available to some degree. New Factory panels were fit this same way. Even the crash books of the day acknowledged that they were 'custom fit.'
It's like computers. They get us here and discussing bits of old Porsche knowledge. We all may not understand how they actually work, I sure don't, but we should not be afraid to try things to make the computers do what we want them to do, as trying and patience and asking others to share their experiences usually gets you where you want to go.
These threads are fun, almost as much as getting a good result...but the key word is 'almost.'Comment


Comment