 Glad your getting ready to knock this out; my guess is your probably feeling better about getting it done as well? Justin
-
Tom, has that BT6 hood ever been kinked? If its cherry I would swap the front inner structure to create the most pristine part possible. Those mount holes have even horribly hogged out on your old hood. Glad your getting ready to knock this out; my guess is your probably feeling better about getting it done as well? Justin
-
Thanks Phil,
I agree with Bruce and yourself that the skin has to come off. In fact it's already off. Here's a picture of the partially opened hem at the rear of the hood. Since the hood narrows near the front the entire perimeter hem does not need to be opened all the way. I just slipped the frame out after drilling some spot welds near the hood handle.
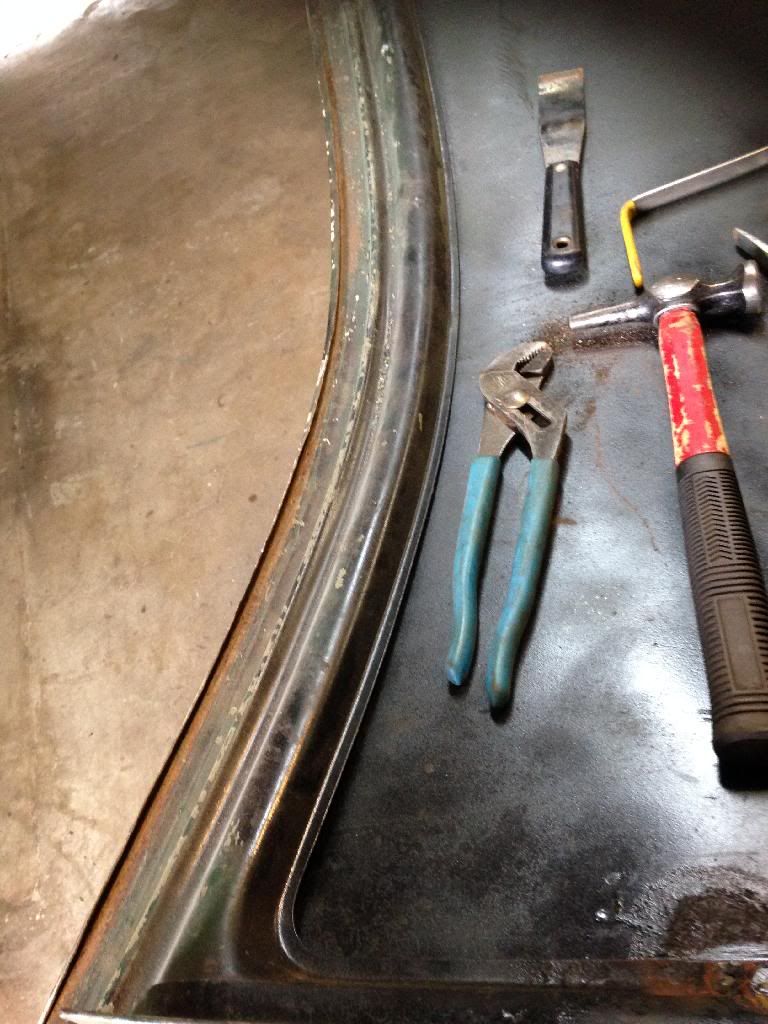
Disregard the pliers in the picture, They didn't do most of the work. Instead, very careful prying was done to prevent distortion on the top side of the skin.
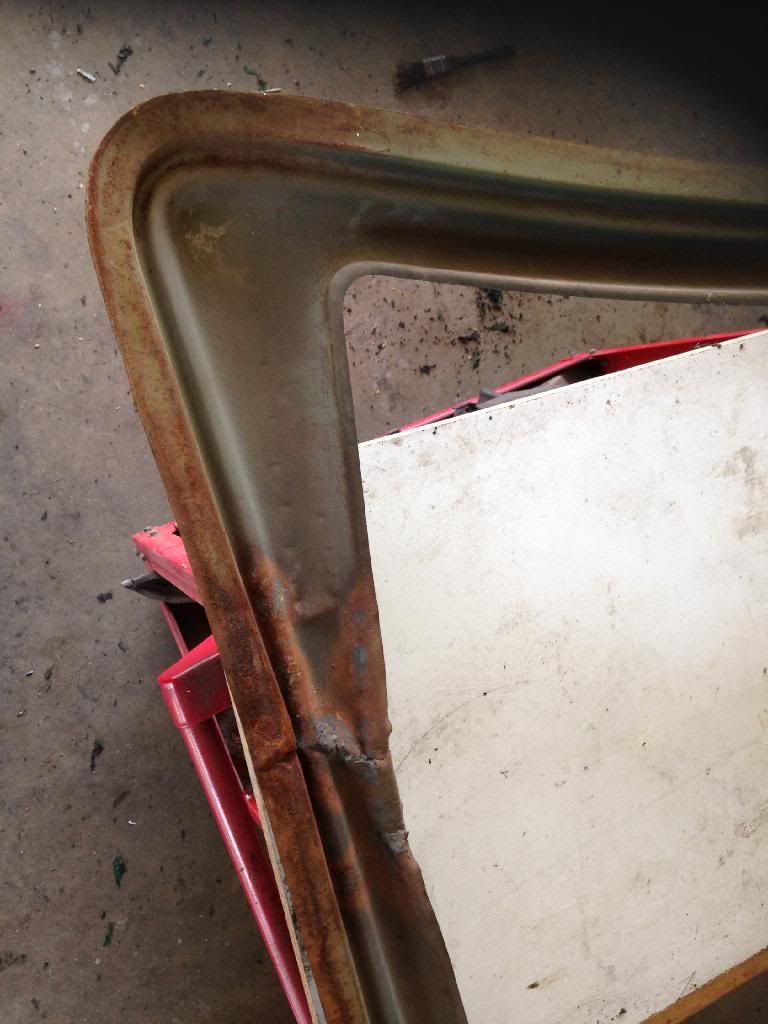
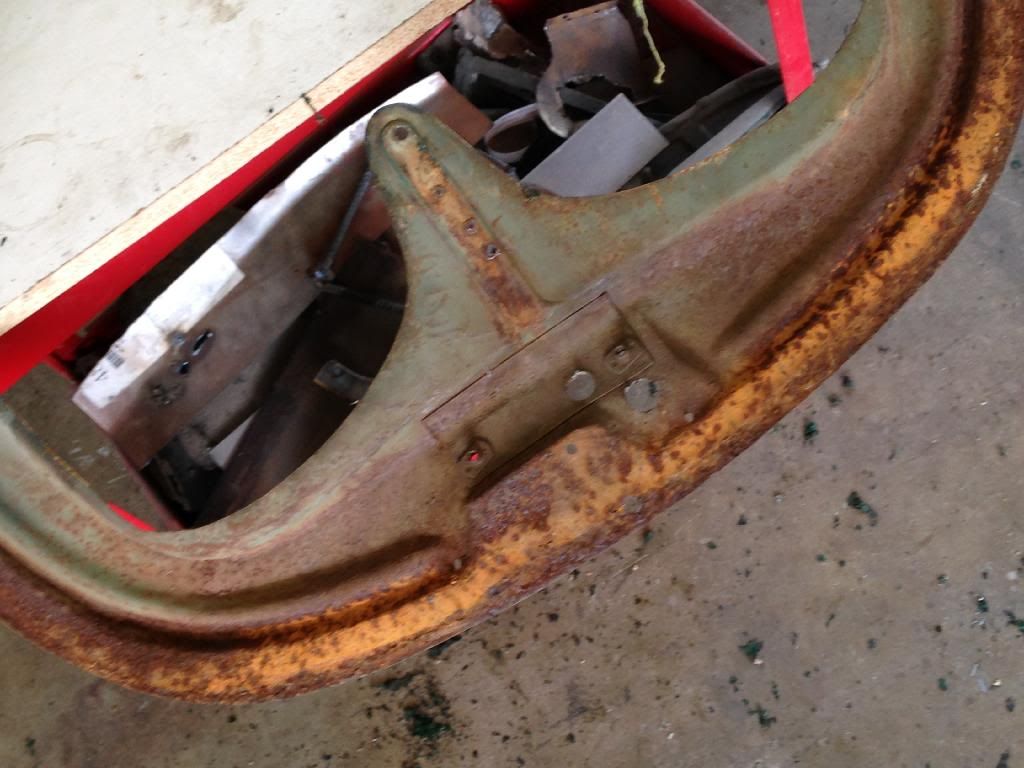
Hello rust
Leave a comment:
-
Tom
Hopefully Bruce will chime in on this. I think he recommends removing the outer skin to get at the rust under the hem. If you are going to do that, you could remove the skin from the other C hood and use its frame if it is easier to repair. May be quicker. Then repair your bad frame later and the other skin. Or, with your great TIG skills cut and past your latch panel to the T6B hood.
PhilLeave a comment:
-
The next major milestone is the hood, which I've been reluctant to tackle because it's a big job. Over the several years this car has been apart a few extra hoods landed in my garage.
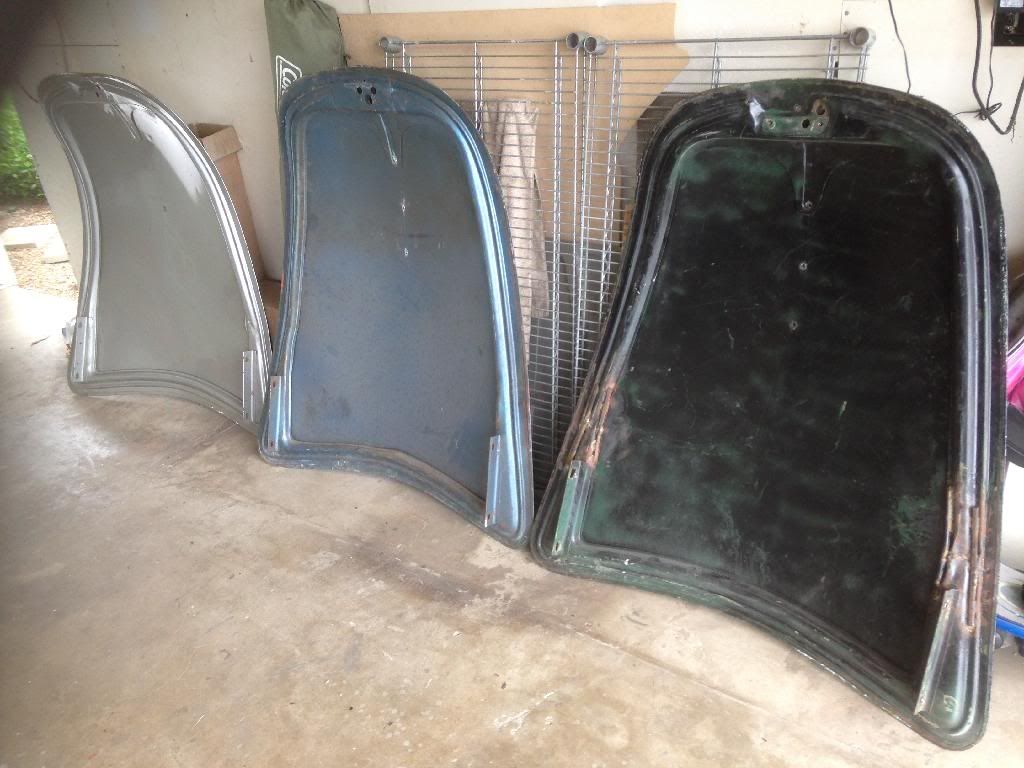
Door number 1 (closest in picture) is the original, or thought to be but there are no numbers stamped on it.
Door number 2 is the nicest one, but unfortunately it's for a T6B. I didn't realize that the latch area is different on the C
Door number 3 looks nice but it's buckled pretty bad at the nose.
Before parts prices went through the roof I was going to make one nice hood out of three, but now the reality is that is just throwing away money that I could spend on interior or paint. So I decided to fix my original and restore the other hoods after my car is in the road ??? Or sell.
My hood was kinked and repaired.
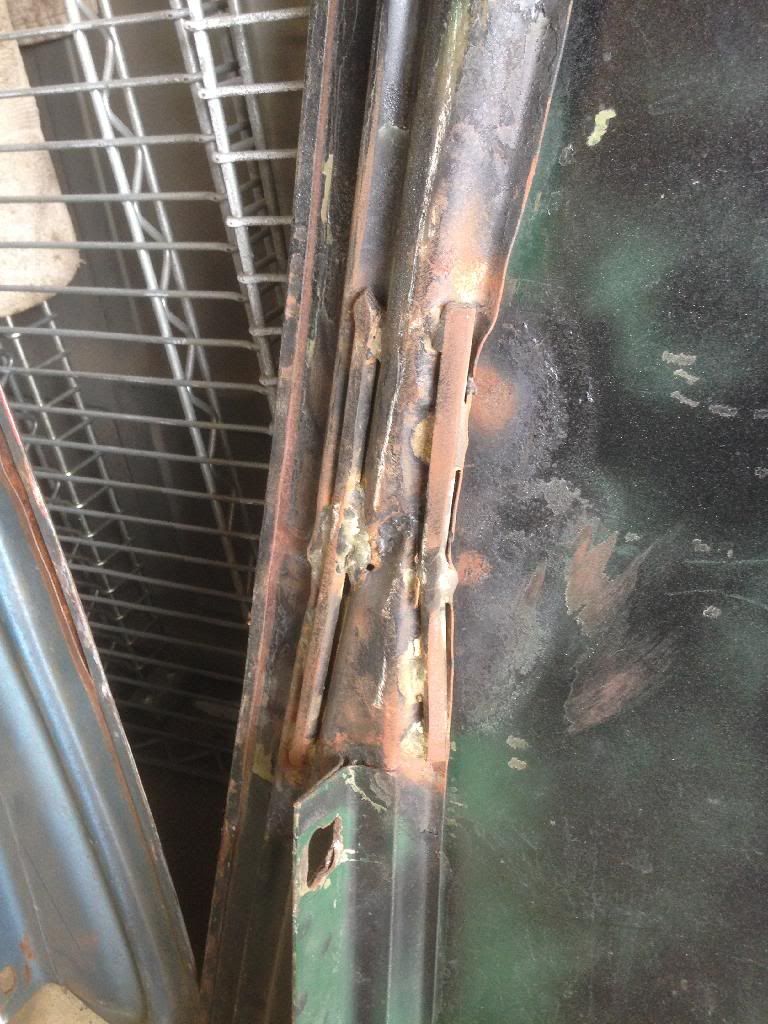
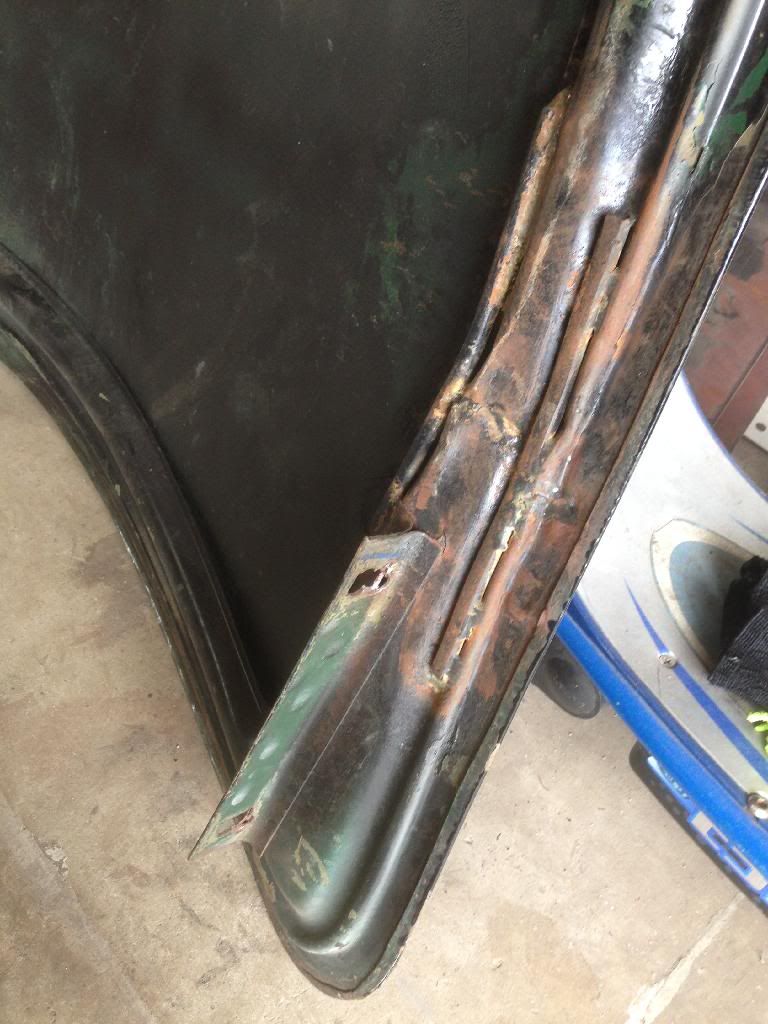
Restoration design makes the corner portion of the frame, but I didn't find the rail section I need.
I ended up making my own, so stay tuned....this is going to get messy.Leave a comment:
-
Tom
Shot size gets smaller the larger the number. #9 is the smallest readily available. I have never seen or heard of #10, but it may exist. #9 usually used for skeet target shooting or close shots on possibly doves or quail. I would think that would be the best size for a shot bag. Looks like yours has had a fair amount of use.
PhilLeave a comment:
-
Thanks Tom! I will most certainly ask him. The metal complies so much better against lead shot or even sand. I have a large table mounted shot bag but never thought about a hand held version; What a great idea! Glad to hear your making some headway on that old hood and am looking forward to hearing about your adventure with it. Thanks again! JustinLeave a comment:
-
Hey Justin,
The bag is from none other than, Steve Hogue. Ask him if he still makes them....I bet he does. So cool that it's made with a seat belt strap and leather. $20 if I remember right. He joked with me about what size shot to fill it with. I can't remember, but he said its CRITICAL. All I know is its heavy and the shot beads are small. No. 9? Any hunters that can comment?
I did work on my hood. I'll post some pics by the weekend. You are going to laugh your ass off. Entertaining stuff!
TomLeave a comment:
-
Oh! That is cool! I have never seen one before; where did you buy it?? I have to have one of those for sure. Thanks for sharing Tom! Justin
BTW: Did you work on your hood tonight?
Leave a comment:
-
Hi guys,
I'm not sure how the buldge got there honestly. I think it was Justin who said someone walked on it and that is the best guess. This car has all sorts of strange damage...all it needs is a few bullet holes, haha. Maybe the wiper motor went haywire???? Just kidding.
My shrinking disc is too big in my opinion for this bump, so it didn't see any action for this. Since the buldge was big and obvious I used a propane torch to gently heat it. Just blue, not red! Then I hammered it down with a rather flat face hammer as it cooled.
The secret weapon is my handheld lead shot bag. This thing is great for shrinking and it adjusts to fit in tight places like this one. Here's a couple of pics.
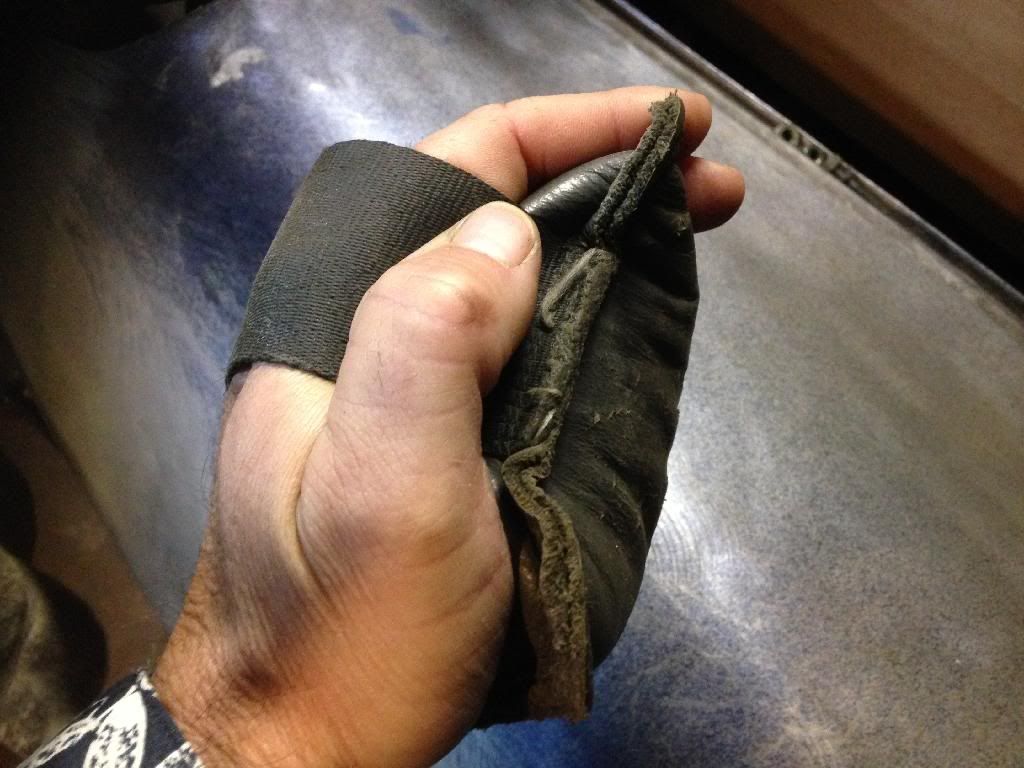
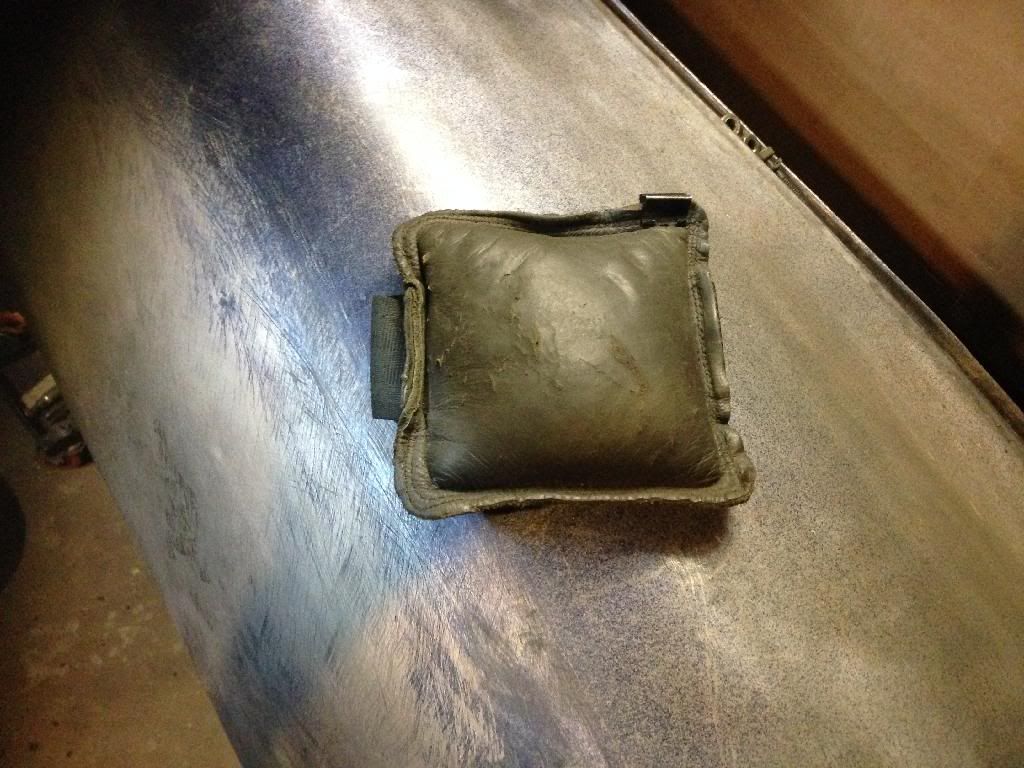
So a few heat cycles and many light hits backed up with the lead shot bag did the job. The areas on the side of the buldge needed some on dolly hammering.
Phil, I saw the photo of your cars nose. That would take a lot of work to smooth out all those lumps. Hopefully I will learn something when I replace my section. My hunch is that replacement is the path of least resistance, but we'll see.
It might take me a while before I get to the nose because my hood is a piece of junk and is getting a full rebuild. I want to finish the hood, so I can gap the nose correctly.Leave a comment:
-
Tom,
The curve looks very appealing to the eye. I may have missed this in your previous posts, but what was the cause of the bulge?Leave a comment:
-
Tom
When I get my rocker and front of rear fender installed, I will be working on the nose, so will probably have some questions for you. I bought from SMC a supposedly NOS passenger headlight area, going from the original nose butt weld on the fender to past all of the openings for the 3 lights. Have not compared the openings yet, but will do as you have done with templates. I really only need the bottom front corner, so may use what I bought as a pattern and try to make just that area. But I may remove the nose to smooth out all of the many small dents currently filled with lead. This would be inboard of all of the openings. Hopefully a summer project.
PhilLeave a comment:
-
Tom,
Just curious...did you use a shrinking disc on the bulge? Looks great!
Thanks!
DonLeave a comment:
-
Thank you all for your luck wishes and anticipation....I will need the luck for sure. I'm glad that these pictures are worthwhile or at least entertaining.
Back on pages 8-9 I reached out to the group for help with my cowl shape. Phil graciously transferred my contour plot to his car and confirmed my suspicion that something was amiss with my car.
Anyway, this strange bump and surrounding depressed metal has been improved.
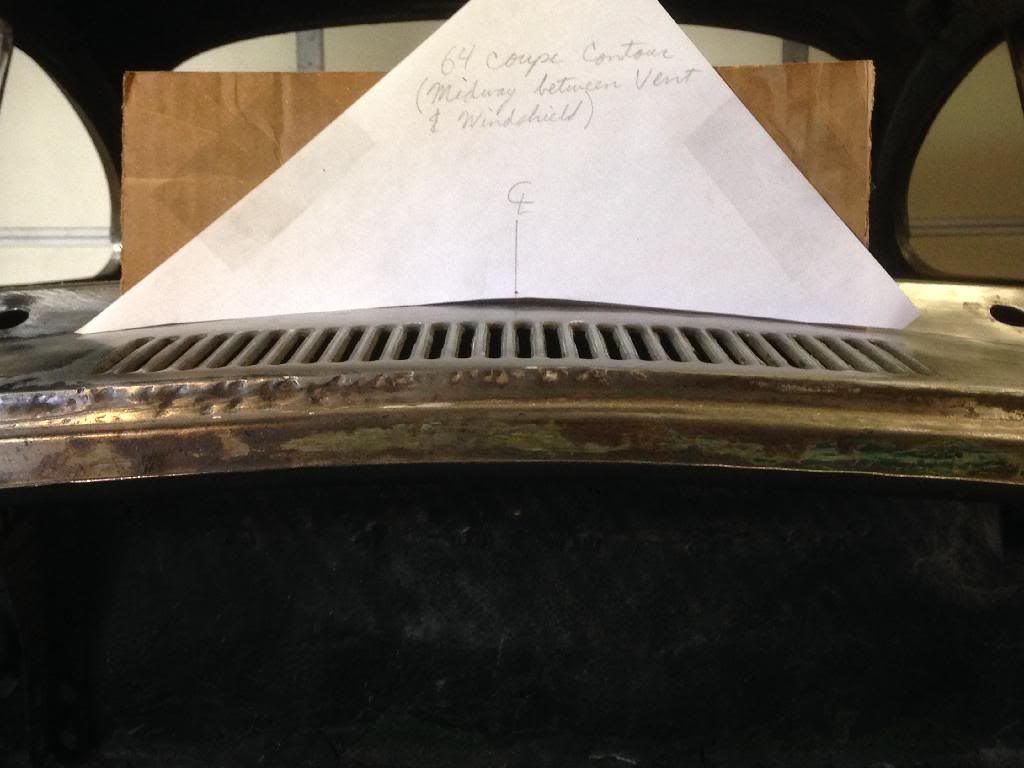
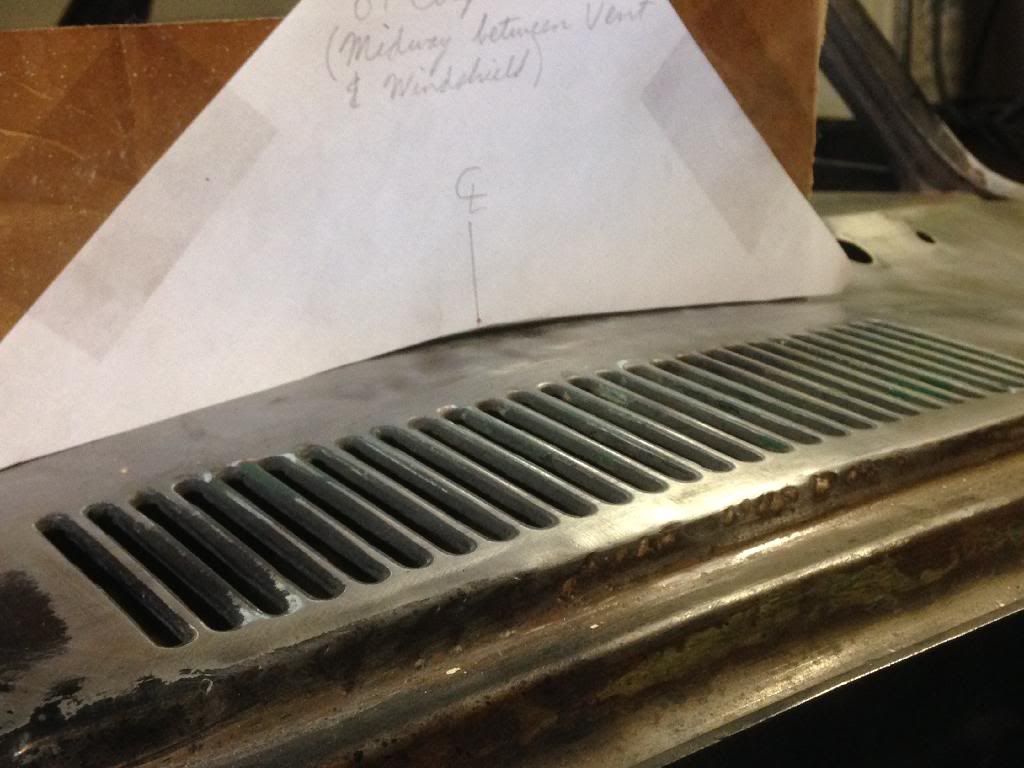
This area needed to be shrunk down almost 3mm. The curvature now appears much more natural and blends better with the hood contour.
Many thanks to Phil. Phil if you (or anyone else for that matter) need any measurements, please let me know.
Good Night,
TomLeave a comment:
-
Very interesting Tom. I think you are correct a complicated pressing that must have had expensive tooling apart from the press.
Not an easy job to get it in place and welded. Hope it goes well.
RoyLeave a comment:


Leave a comment: