
Tom - I will be following this with great interest. Good luck.
Phil
-
Thanks Justin,
Yes, I probably could have saved this half of the nose, but my patience is waning and less overall time will be needed to fix the new panel and replace. The original was overstretched, lumpy and ground thin in some places. Also the headlight bucket patch was lap welded crooked and the grills would need to be re-worked/patched anyway.
The challenge with the new panel is going to be make it fit and get the wired edge transition to look right. C cars don't have the wired edge across the entire nose, but there is a transition from the fender opening to the nose flange.
I think I will keep the old nose and display it on my garage wall to remember all this metal work fun.
Here's another picture of the nose piece overlaid on the existing nose. This was just for fun and I only spent 30 seconds clamping it in place. (one clamp, ha ha)

I can't really comment on the fit until the old headlight bucket doesn't interfere and its properly clamped in place. I'm sure some stretching and shrinking will be needed to get it to match the existing fender which is hardly damaged at all.
Also, this part seems to be stamped from one sheet. So someone has a very big press with expensive tooling to make these. We are lucky to have access to these complex shapes as you say. Trevor and Steve form theirs by hand (assisted by power hammers and E wheels).
I've been procrastinating big time on the hood, but I took it down from the rafters yesterday and will begin repairing that soon. Hopefully I can post some small projects that I finished during all the delay.
Thanks again for your comments.Leave a comment:
-
Hey Tom,
Thanks for the update. I didn't think the nose on this side of your car was rough enough to warrant a full replacement? Jack sure called it but it really is par for the course on any of this replacement metal. Looks like you will be tweaking, cutting and splicing those openings much like the rocker panels to create the correct contour. Actually I am quite impressed that anyone offers those noses be it A,B,or C. What a complex compound shape they are; beautiful of course but so many curves all going on at once. Maybe its just the photo but the center nose section looks a bit long an hair-lipped? Is it or is it an illusion due to the bottom not being pinned up? I have no doubt this will be a fantastic repair once complete. looking forward to seeing it!
JustinLeave a comment:
-
Well, I got the nose panel this week and Jack was right. I fully expected that some mods would be needed as in every repro panel so far, but this one isn't too bad yet.
Templates made to compare grill holes,
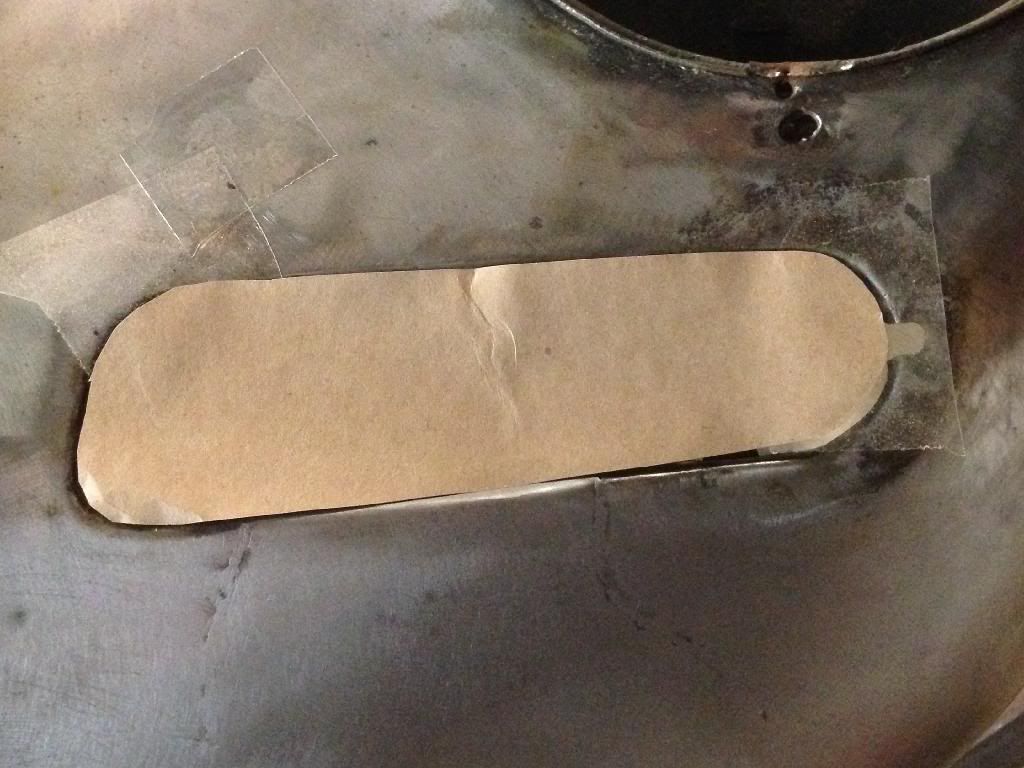
Flipped and placed on new panel from Sierra Madre
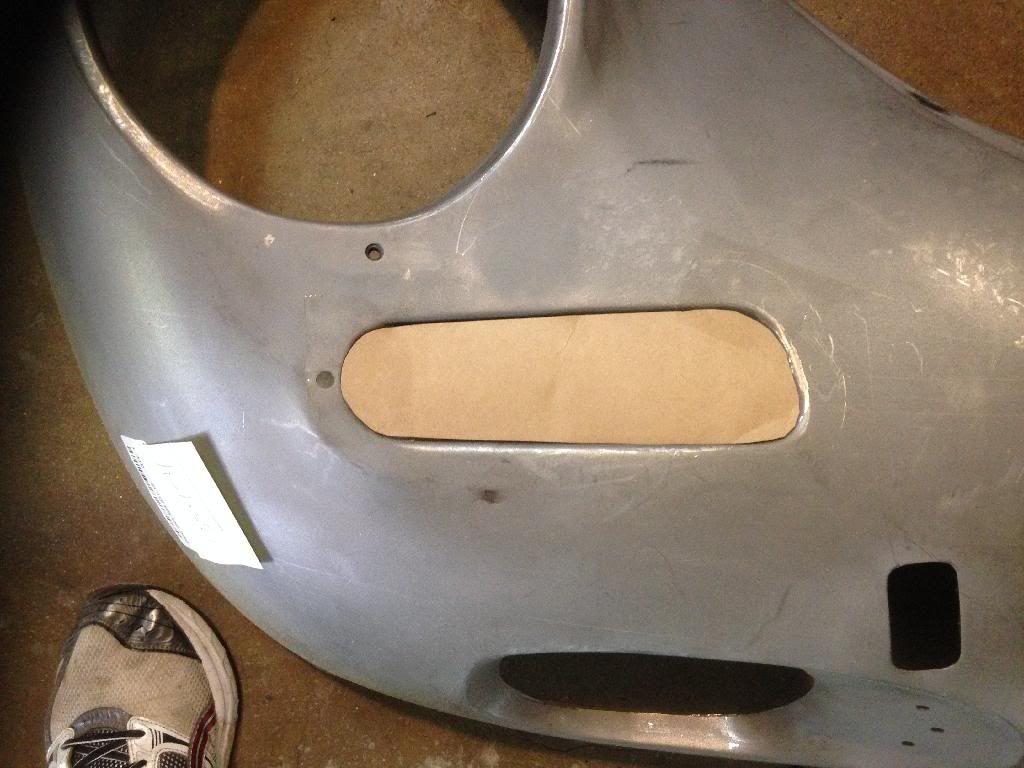
Not too bad....one radius is a little too sharp and it's not evident in my pics but the angle that the flanges protrude into the wheel well is a bit different too.
The fog light opening needs even more work.
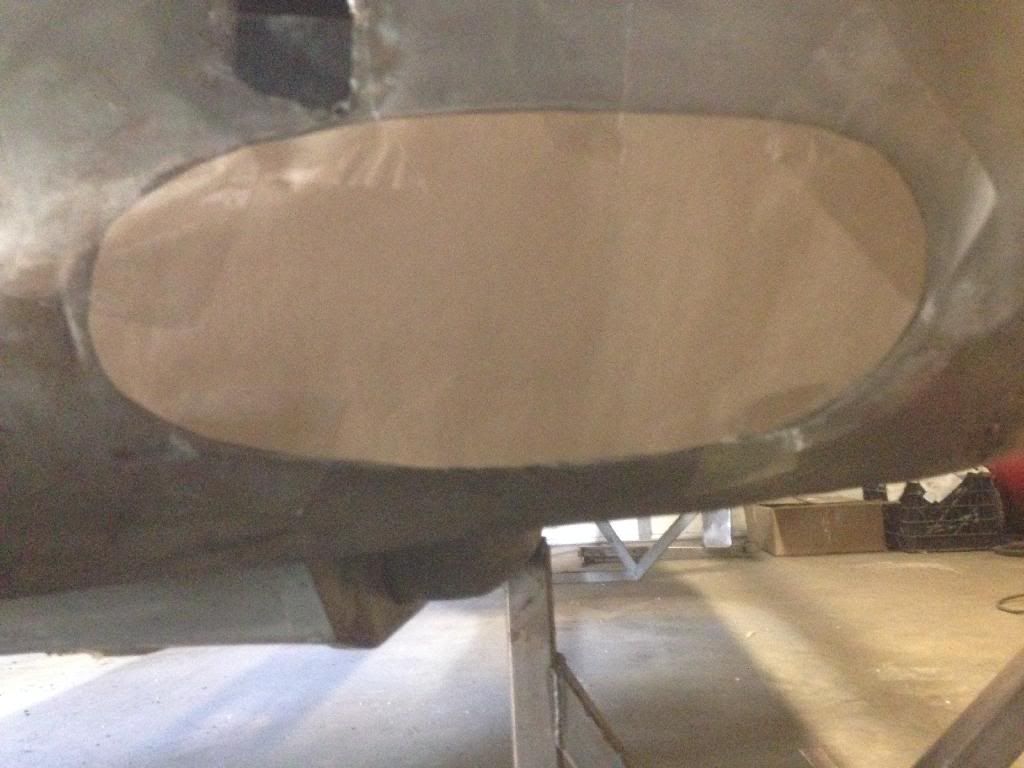
New panel
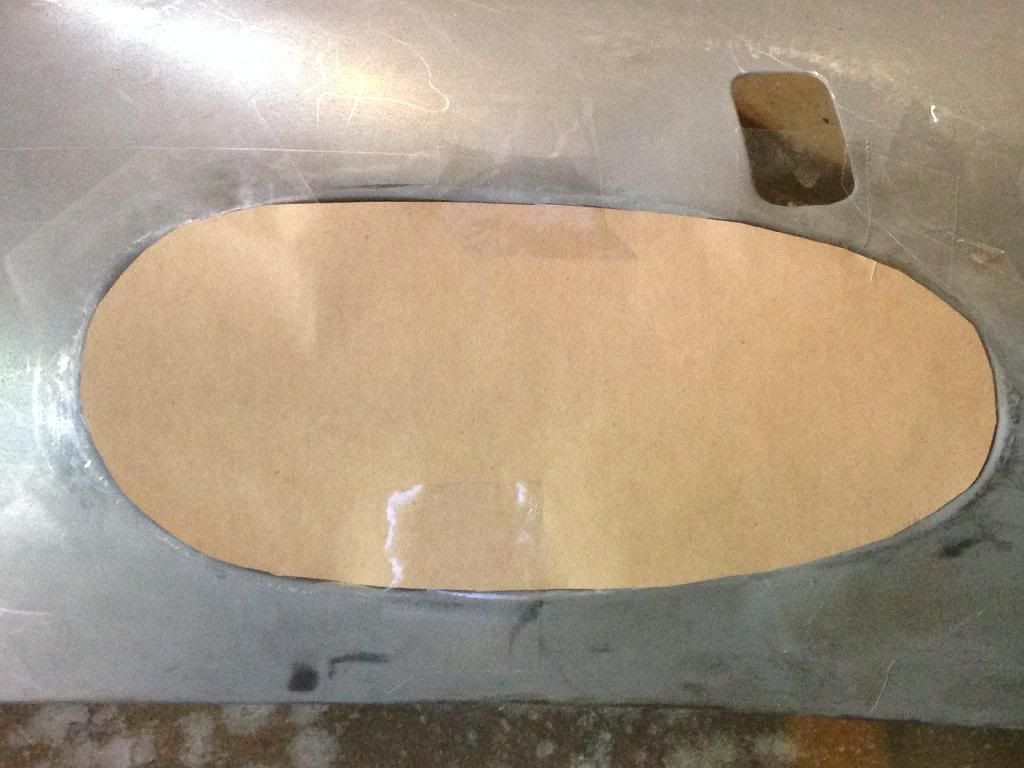
Top left radius is off. Should follow wire arc below.

The bottom contour has a strange lump in it.
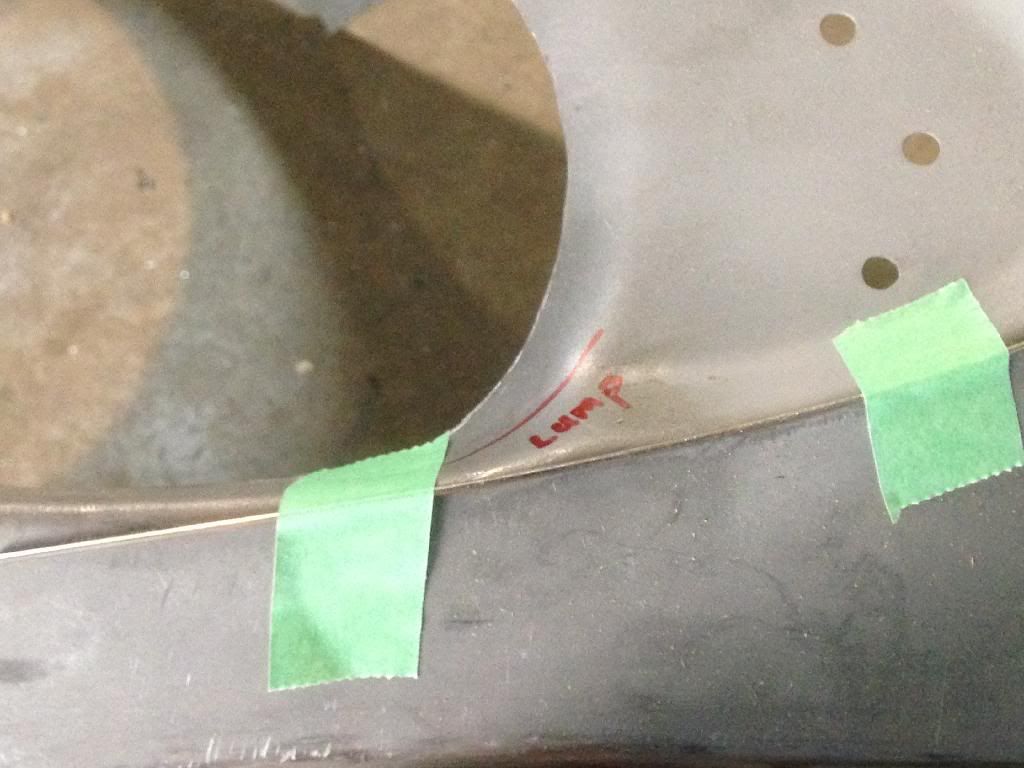
All in all, I think it's better than nothing to work with. I'll fix these minor areas before attaching the nose . Of course I had to lay it in place for another self motivational picture.
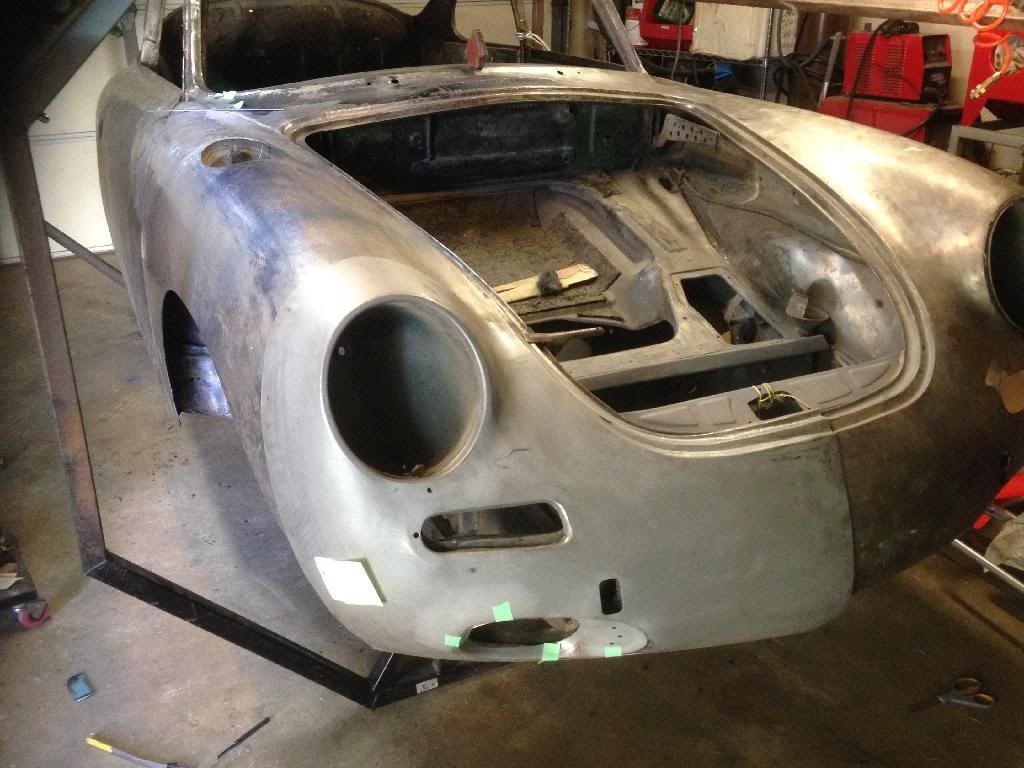
Thanks for checking out my latest purchase. Worth $450 I guess.Leave a comment:
-
Simonsen, Resto Design,Trevor's, Hogue, Stoddard (ie: NLA, SM, etc) NOS, all seem a bit different, particularly at the upper grille opening opposite the bullet lamp. Most seem more rounded, less angular at the trapezoid end. Look at some, you'll see the difference (I hope!)
JLeave a comment:
-
Good point Jack. Do you or anyone else have a preferred source for an accurate nose half?
My first thought is Sierra Madre because I can drive and pick it up fairly easily.
I've yet to buy a panel that fits, so I fully expect to "customize" this too.
Maybe that's why many replace the entire nose! I did notice that a complete nose is much more than two halves?????
Thanks for the comment.
TomLeave a comment:
-
Tom, if you don't have your replacement 1/2 nose yet, I would suggest getting it before proceeding much further. I have noticed minor differences in various panels, particularly around the upper and lower grill openings. Since you are working on those areas, it will be easier to make them match before you are finished and have to re-do.Leave a comment:
-
Thanks Justin! This car is peppered with patches now. One of these days I'll need to add them up. Somewhere around 50 is my WAG.
I decided to save the nose on this side although a few more patches are needed. One at the bumper hole and another where the fender brace meets the nose. Its strange that the original headlight bucket is solid, so I plan to use this original nose for reference when replacing the other side. See pics at bottom.
Thanks John, how is your new welder treating you? Inquiring minds want to know. And yes, not much grinding at all. Here's the patch all smoothed out. Yay!
Here's the other side which I'm not going to attempt to repair. A new half nose will be ordered soon.
Check out the headlight bucket installation. Ah....the tragedy.
As much as I want to cut it now, I'm going to wait to see the fit of the hood both before and after the nose replacement surgery.
Take care,
TomLeave a comment:
-
Tom, it looks fabulous! Your TIG welds really shine. Not much grinding to do.Leave a comment:
-
Beautiful fabricated patch Tom! I've said it before but those TIG welds sure do lay out nice! How did you crown this patch to profile? On a block of wood, shot bag? Nice job as usual! JustinLeave a comment:
-
No problem Phil, we are all anxiously awaiting your pictures of this area.
Here's a picture of a nose patch that was done a few months ago.
Check out the 1" thick bondo held in place by the fog light bracket.
Patch made to fit existing contours.
Trimmed in.
Welded, but final bend yet to be formed.
Backside view showing penetration and heat affected zone.
Next time I'll show the patch ground flush and bent correctly.
Thanks again,
TomLeave a comment:
-
Thanks for making and posting that sketch Tom. I hace saved I to my Lock Pillar folder. That last double flange is missing on Foamcar. I have chosen to repair ala the Bruce Baker method. I also was wondering why all those bends. Strength? Even out the rusting around and up and down the car?
PhilLeave a comment:
-
John and Justin, thank you. This website is a great resource and it's fun to contribute and help each other. This is my first 356 and without detailed forums like this one, I would be totally lost.
Below is a quick sketch of how my quarter panel was assembled to the lock post area. I'm not saying that this is how all cars were built, but I thought it might shed some more light on the subject.
One of the surprising things to me is that my car has a cavity between the two parts. My guess is that the factory chose this accordion shape for strength and adjustability when assembling these cars. My car probably needed the lock post pushed back a few millimeters for the door latch to work correctly, so the spot welder guy came along and left the cavity shown in my sketch. This cavity is not desirable for corrosion protection, although my car is so rusty it probably wouldn't have made a difference, ha ha.
I didn't have a good picture, but I sliced the quarter skin away to clean out the rust as best I could. I will inject epoxy primer or POR15 inside the flanges/cavity. Then I will rotate the car on the rotisserie and use compressed air to coat these accordion areas before seam sealer and undercoating is applied.
That procedure, along with my added welding to this area will take 100x longer than the factory spent on this area!
I hope this doesn't confuse the situation more.
Thanks,
TomLeave a comment:
-
Beautiful fabrication and repair as always Tom! Keep up the great work!
JustinLeave a comment:
-
Tom,
Thanks for posting the close-ups of this complex area. They will definitely be quite useful when I get to this point.
JPLeave a comment:


Leave a comment: