Originally posted by tperazzo" post=19318
-
Tom, you should contact Tim Goodrich. Tim recently made perfect reproductions of both the early and later style hood seals. -
Looking good Tom! Minor adjustments are of course no surprise but the initial fitment is very nice. Quite the accomplishment! I must have the international Merch. seal because mine has the hook on it as well. Its a nice seal that doesn't require too much pressure to get the hood closed. Does anyone know how many seal manufactures there are for 356?
Great job Tom!Leave a comment:
-
Thanks for all the good hood seal info guys.
My frame and skin have finally been re-married.
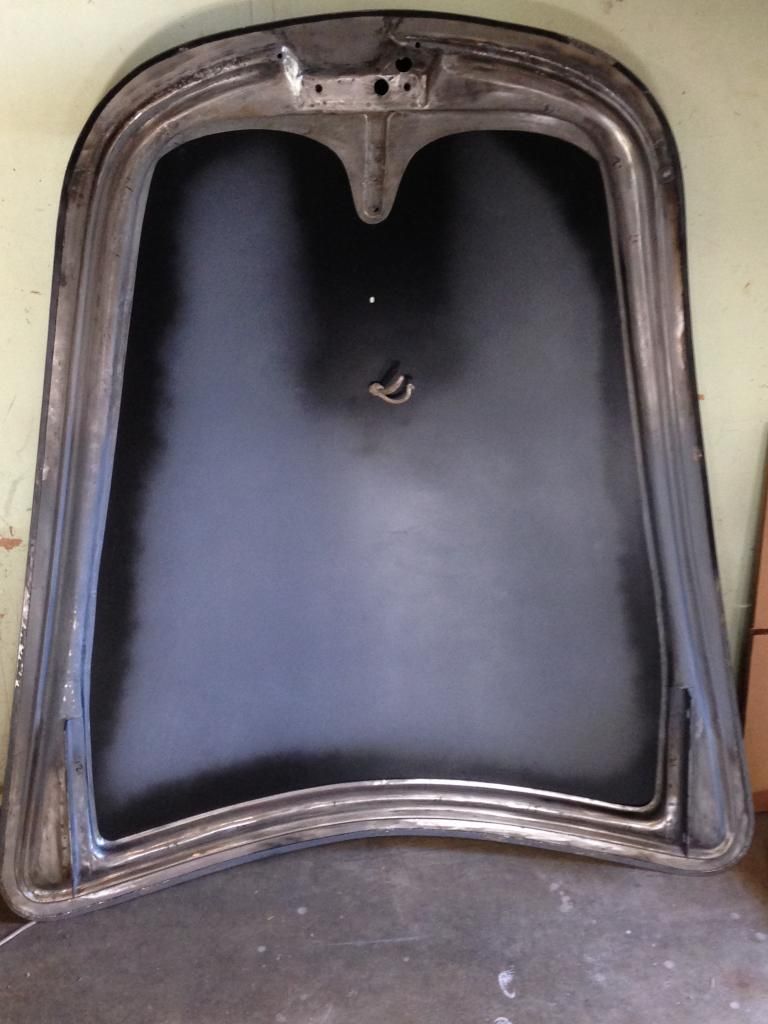
Everything was well painted inside except for the yet to be spot welded areas. I'm waiting until the last minute to finalize the welding so that the hood remains flexible to needed contour changes. The re-hemming operation went just fine. Whew!
Two hood seal profiles shown.
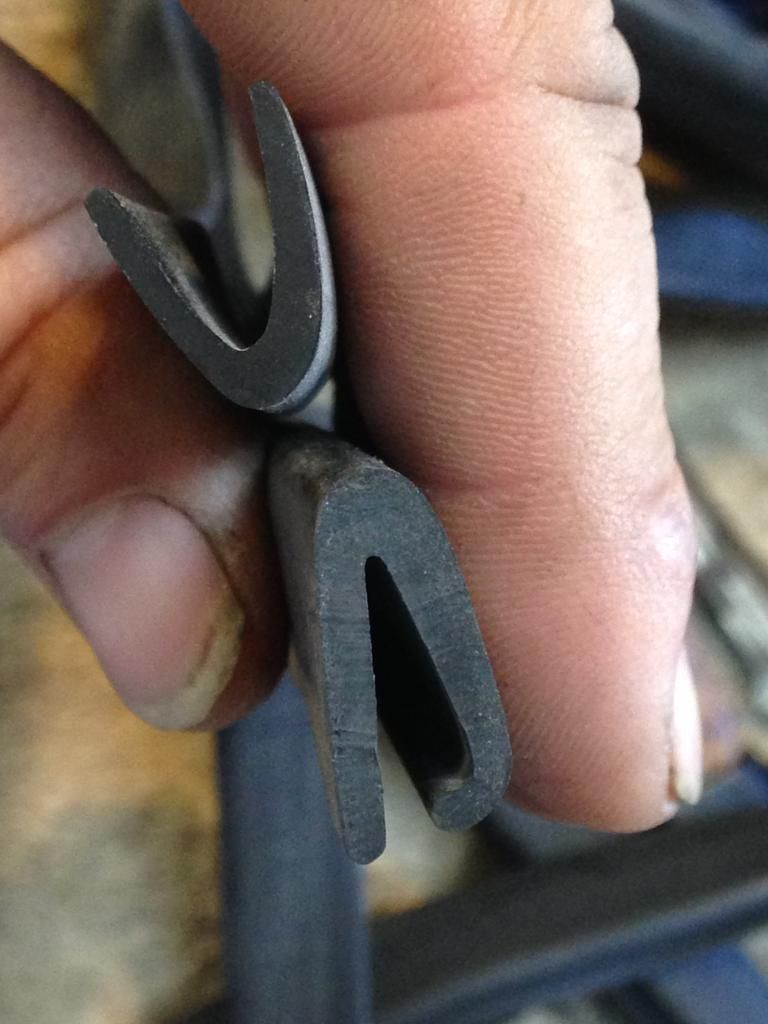
The upper one is Velospace (sp?) and the lower one is International Merchantile. Both are very different, but they feel similar in squishy-ness.
The IM seems to fill the width of landing best, so I mounted that one first.
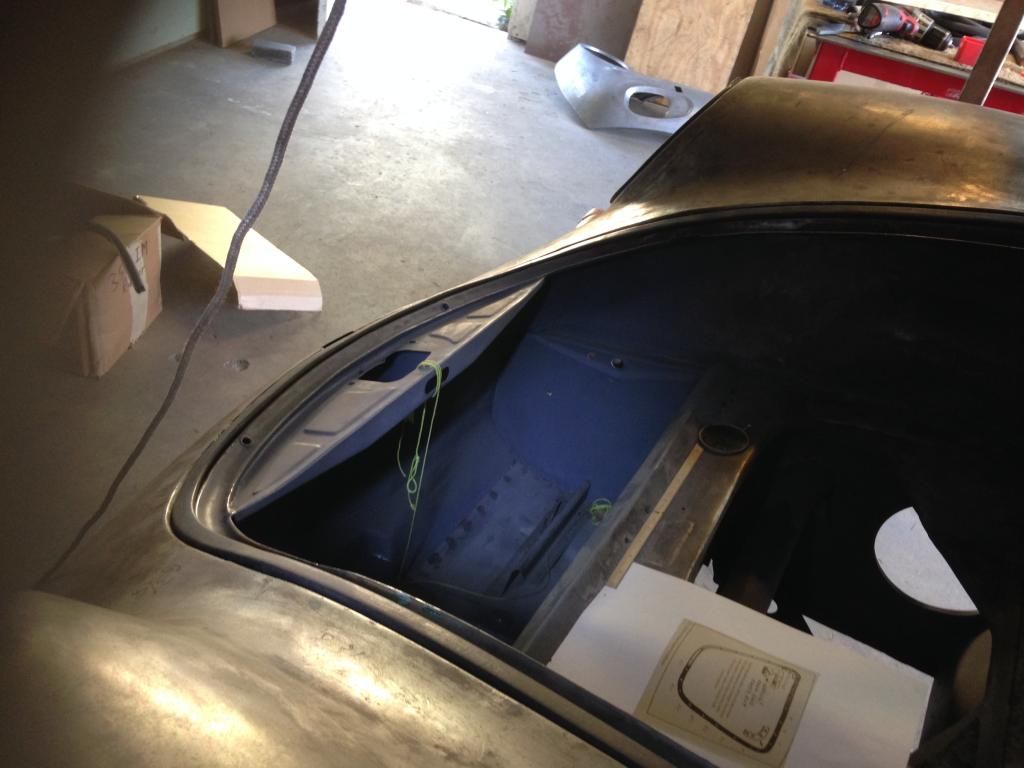
Holes were drilled according to Kellogg's book. Thanks again Don C. I have the book and re-read the entire section.
Nails and cotter pins are temporarily holding the seal in place versus the tedious screws. I figure that the seal needs to be removed several times during leading, switching vendors, alignment, etc. So this trick seems like a time saver. Where ever the seal didn't want to lay flat in the corners I used cotter pins and folded one of tangs to keep pressure on the seal. I wonder if the screw heads make much of a difference to the way the seal compresses?
After a bit more wrestling with the hood it's fitting fairly nice. The drivers side still needs a bit of curvature removed to sit even with the fender, but its within 1/16". The nose gap offset is a bit off, but I think the latch may pull this down nicely.
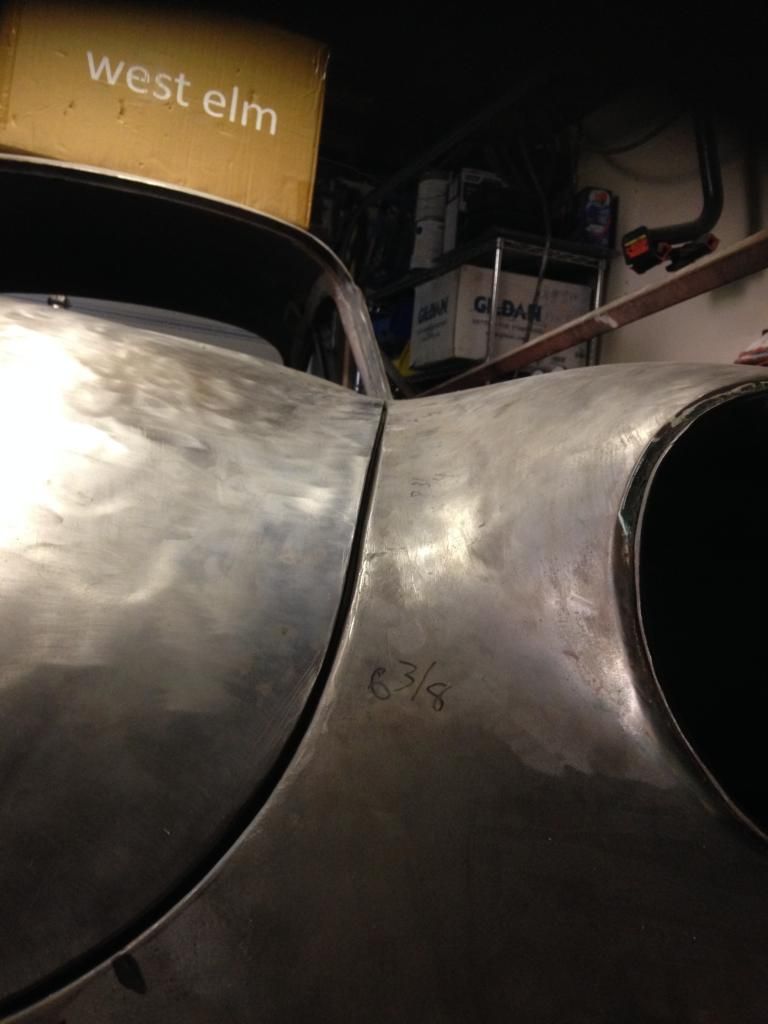
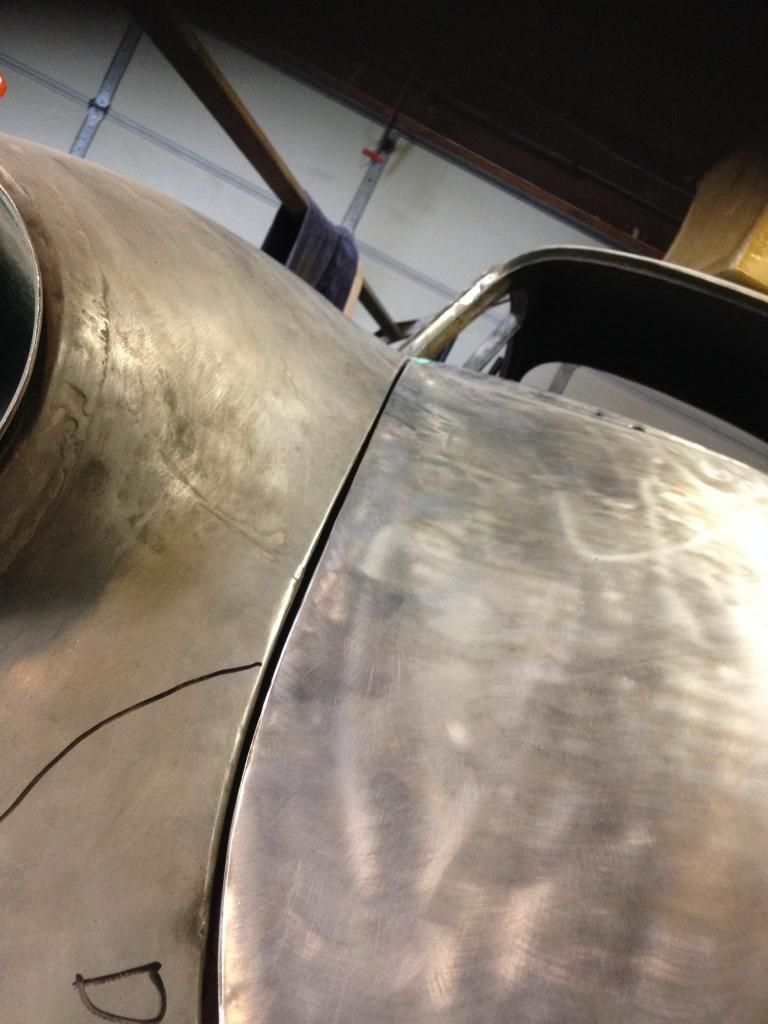
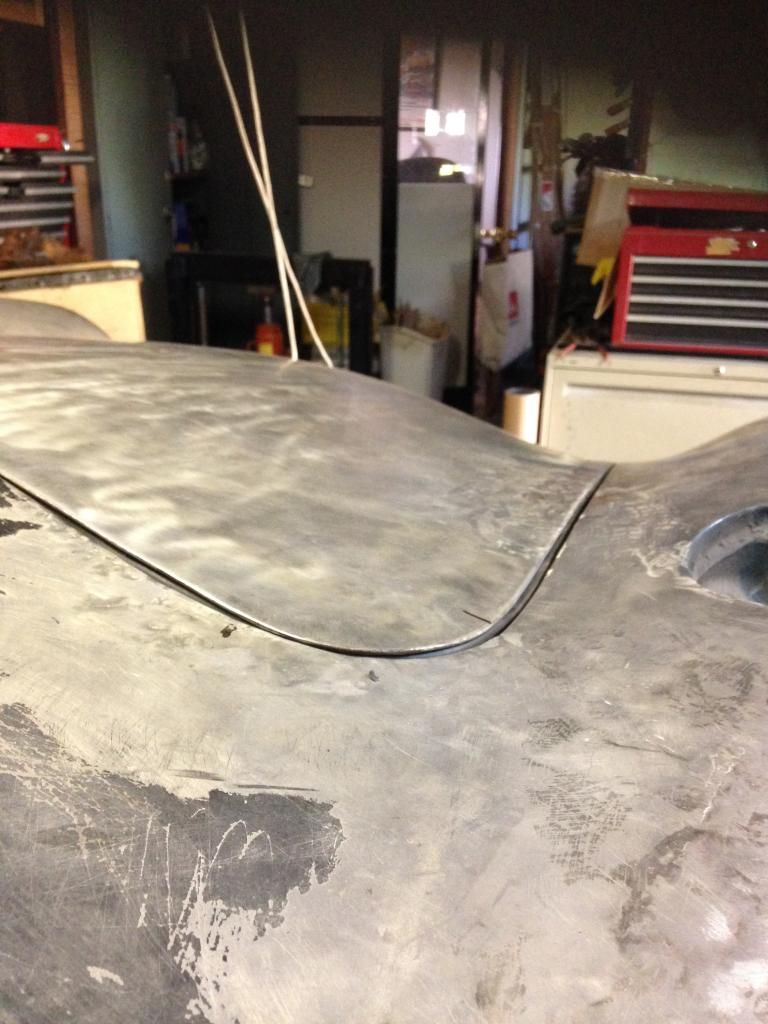
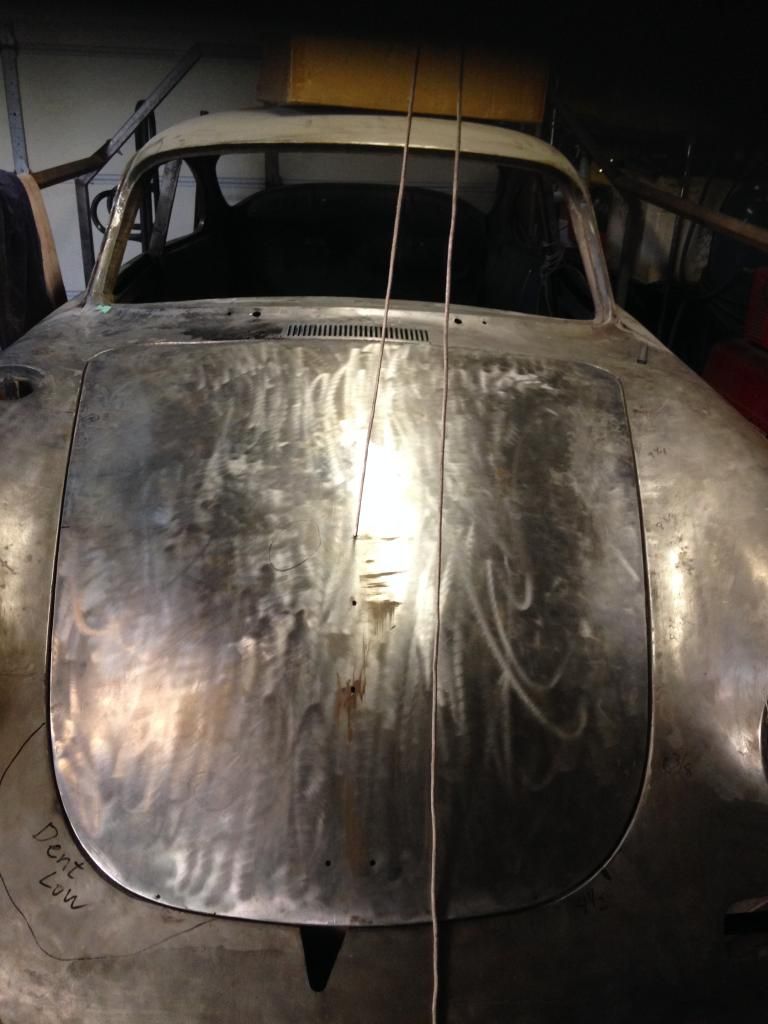
Lead is needed where the gaps are too wide and/or uneven.
I'm going to continue tinkering with the hood fit, but my sights are set on the nose.
Thanks again for everyone's help.Leave a comment:
-
Jack, doesn't flying Trans Love require some sort of operation?Originally posted by Jack Staggs" post=19248
Not to seem naive, is the below the source of the pipes they sing of loading in the clip you provided?....I know in the '60, that sound they make got ME high! (Not Momma Cass!)
Leave a comment:
-
I've been busy with other projects,so no progress on Foamcar, but am following the other projects here. I replaced the hood seal on my 55 by using a tool out of my gunsmith screwdriver set. It is a small ratchet that a short Phillips or flat blade bit fits into. With the hood open(of course) it was pretty easy to remove the corner screws. The bit is knurled on one end, so makes it easy to press down onto the screw while turning the ratchet handle. Can post a picture under Tools if this was not clear.
PhilLeave a comment:
-
It's really almost impossible to install the hood seal with the hood in place. Stubby and right angle drivers can barely be made to work. FWIW, one out of 20 cars needs to have the holes welded and re-drilled on the left coast. And drilling welds is tough, particularly when the OG hole on the 2nd layer is intact, forcing the bit to wander off center and snap in the hole (more common in the rocker area). Now, that's a problem. RE: gasket split location. Always on the right side, but sometimes anywhere between the 4 screws. FWIW, I have nowhere the experience of BB dealing with rusted out stuff. He's my hero. I'm not kidding. Bruce, fly trans love airways. Always gets you there on time. http://www.youtube.com/watch?v=023ENkCFupYLeave a comment:
-
".....at the factory the seal was installed after the hood?"
No, I doubt that the hood was on when the seal was installed, that was a farcical comment, but I have gotten seals OFF without removing the lid, occasionally removing the screws first.
'Most' original hood seal joints are found on the outer end of the corner 'boomerang' brace. Maybe a re-re-reviewing of the sleep aid "Made by Hand" is in order? My point is that joint is visible, so there must have been a reason for the Factory to make it there.
The workshop manual tells us to remove the hood to replace the seal and to check the (hinge to hood blade)alignment holes drilled just for that car after it's final adjustment....so it was repeatable if the car was kept complete. Now......hardly any original adjustment holes are worth keeping. They get welded closed and redrilled when all the refitting is complete, the car is painted and the seal is reinstalled....then the new holes will get you close.
Regards,
-BruceLeave a comment:
-
Interesting Bruce, so at the factory the seal was installed after the hood? This in turn would created the need to have the joint between the lower screw pair? Have to have one stubby screwdriver to get the ones to the inside of the hinges...Leave a comment:
-
What do you know?
You may know that maybe the joint of the seal was done after the lid was on if it's done where it's more obvious? To be less obvious and discreet, the joint made between the inner 2 screws just 'looks' better.
Like so many things on a 356, 'improvements' can be made if more time is allowed now than Factory assembly allowed back then.
A bit iconoclastic, I know.....but it's nice to not be alone in that regard.
Thanks,
BruceLeave a comment:
-
Yes, seal definitely opens to the outside. To Bruce's point on where the joint is positioned:
My restorer buddy here in town says the joint is always located under the right side corner clamp. This was a black C cabriolet he was finishing up.
According to him the joint was found most often than not between the inner first and second screws. He says he's gone rounds with concourse judges on this detail, some of whom agreed and some who did not. Like Bruce says they could not ALL have been in exactly the same spot. More trivia to confuse you Tom!
For my car I just followed his lead; what do I know?
Leave a comment:
-
Tom, I find the holes easily by wounding the tip of a finger, passing it along up under the ledge of the gutter. Either they were punched or not de-burred after a quick drill, I don't know, but if that area is original and there were holes, you'd feel them.
Most original 356s have a depression where the screw hole is, making it seem that a sharp awl was used and not a drill.
The screws in the kits are somewhat weak, so just the right diameter drill is needed through those layers of sheetmetal or they break off if that's how you do it. Maybe that's why you have fewer holes...the apprentice was learning and afraid of making a mistake.
Then too, I have been on various factory tours, including Porsche in the '60s....and would NOT want a car built on Monday morning or Friday afternoon....witnessing a lunch that included one or two liters of beer was bad enough.
-BruceLeave a comment:
-
Thank you Don, I owe you one. I wonder if the factory was lazy on my cars build date? The holes just aren't there. I will add them. Thank you Roy and Bruce also. Loved the story about lock washers and being screwed. Have a great weekend.Leave a comment:
-
You guys make guys like me think and then check. All the time. I looked at a few original cars for screw positioning...and they are all different, but here's the real guiding phrase: "made by hand."
All I have seen have been glued AND screwed. Less screws where there is less tension in a curve and v.v. Please see that part of the instruction page.....it's helpfully ambiguous.
I can buy into 28, but I try to reuse what holes are in a 356 when they arrive, whatever number.
I have seen an original seal that was cut inboard of the 2 right corner brace screws, but all the "experts" say it's joined between the 2 outboard screws. Then again, the shop manual has that part of the seal airbrushed to not show a joint or the joint is out of the picture on the left corner. Who knows...but beware of anyone who says "always" or "never."
A high-level Concours judge took points off a really nice Roadster's score years back because it didn't have 16 lock washers under the 16 door hinge bolt heads, as that's what is called for on in the parts manual. I called a few guys I know who have been around this stuff as long or longer than I have and asked for their experience with original cars. All said they had seen some with and some without all 16 washers and came to the conclusion that the assemblers did not install a few when there was a door hinge clearance or fit problem and thus no points should have been withheld if they were painted body color, clean and 14mmATF of a consistent brand.
Just know there were no two 356s EXACTLY alike, so get the cars done and drive 'em! If you don't, the hood seal isn't the only thing getting screwed.
Leave a comment:
-
Tom,
Yes there are screws going around the entire perimeter and it's also glued. Jim Kellog's book "Guide to Do-it-Yourself Restoration" shows the approximate screw locations on page 86.
Note that in the drawing he shows the seal facing inwards which he later said was wrong, it faces outwards.
Leave a comment:
-
Tom,
Mine has a corner bracket both sides as I rememeber? also my 356C had as well.
My T2 also has all the screws aound the complete hood. I attach some photos that shows how the hood lays in the opening.
Remember this, something I forgot the seal is joined together under one of the steel corner brackets!!
Also althought he screws hold it in place, the seal needs gluing to make it look correct. I tried once without glue it did not look correct rubber moves between the screw holes and does not keep straight
The last photo shows a drawing of my original hood screw holes from memory I did for some one else years ago. Might be of interest to someone with a T2
RoyLeave a comment:


Leave a comment: