 Tweet
Tweet
Tom, it would be nice to have the tracings of the grill openings to compare with the panels that you have. Perhaps Phil could make them and send them to you. I think folks would like to see the comparisons. I certainly would. My best guess is that his is OE. IIRC, those were the only ones that came with the upper grille support already fitted.
-
Jack (analog man from the stone age) -
Good idea Jack. I will make tracings, scan them in, and email to Tom like I did the cowl top. Will let you all know when I have the scans and can email to anyone else that would like them. These were advertised by SMC until several months ago. Have not seen them since.
PhilComment
-
For sure , I'd be happy to compare paper templates with my nose.Comment
-
Progress on Foamcar has slowed to a snails pace as it always does this time of the year. But, I hope to be back at it more regularly in several weeks. I did remove 1/4" from the rear of the rocker from hell to get it to follow the wheel opening better. Need to weld it up yet:
Also marked potential cut areas on the nose for removal to smooth out the dents. Hoping for some critique here:
The left side is different as planning to use the NOS left front piece and this is where it overlaps.
PhilComment
-
I understand all about that Phil but a little progress is always aces over no progress. A while back I remember a guy who drew a grid over his front end (a few Horizontal but most were vertical)and had a corresponding paper template for each grid line with the desired contour for that specific section. I think that would make for a great roadmap provided you have a correct front end to create the templates. Your cut lines on the left side are good, naturally you want the shortest welding distance as possible. The only thing I can see moving is your cut line between the upper grille and your fog light opening. I would make the cut dead center over that inner reinforcement plate to both conceal and bridge your weld joint. Keep up the great work! JustinJustin RioComment
-
Me, I'd either cut the left side like the line on the right vertical, missing the opening returns altogether OR cut the left nose off (after cutting the support immediately under the headlight bucket) at the line where the left fender joins WITH the front center part, cutting just below the edge of the trunk opening about 25mm.
I use a LOT of the clamps: http://www.eastwood.com/intergrip-panel-clamps-set-of-4.html
To each, their own!
-BruceComment
-
More 20/20 hindsight; I usually clamp the repro rockers to average with the door, shading toward the end that fits the best, then look at the hole at the rear to see how it lines up with the torsion bar cap inward (being confident that a torsion bar could be removed through that hole if necessary) and then if the rear edge needs shortening or recurving, uncurve, free the wire and make that adjustment without cutting the outer skin.
Of course, if only a little arc adjustment is needed, some MIG weld can be added and ground to an eyeballed acceptable contour. "Made (and fudged) by Hand."
As for my own 356, deep in re-re-re-restoration, I'll comment again; "It's amazing how long it takes to finish something you are not working on."
-BruceComment
-
Bruce
Thanks for the critique. Good suggestion on cutting the "better" side in the same vertical. Not sure what I was thinking with going through all of the openings, trying to minimize the length of the welds I guess.
As to the rocker, it needs to move about 1/2" forward at the rear. The torsion bar hole was off 1/4" so I wanted to get that centered. The other 1/4" will be done as you described. I also thought 1/2" at the rear would be noticeable regarding the narrower distance from the rear to the hole.
I have those Eastwood clamps, but don't like the wide gap they leave for mig welding. I have thinned mine out to make the gap narrower.
Too bad rust does not heal on it's own. I have tried just staring at Foamcar during the summer, but nothing changes. At least I am down to one car to repair instead of 2. I used to alternate years working on them.
PhilComment
-
I have those Eastwood clamps, but don't like the wide gap they leave for mig welding. I have thinned mine out to make the gap narrower.
I understand your concern, but are you cutting that piece off (that is going back where it came from) with something thinner than the blade of that clamp? I just am disappointed when they get stuck from being too close to a spot that naturally shrinks!
I like cutting a piece off (that will not be replaced but straightened and reinstalled) with an air saw. Less widening by 'wander' and you can still start that cut with either a heavy duty Dremel cutting disc or a typical 'whizzer wheel' plunge done very carefully, sawing the rest of the way.
As with door skins, the usual way to weld is with a back-up of copper or aluminum and 'lacing' spots so heat (and warpage) is controlled. Backing the gap with another non-stick metal keeps the spots shallow without burning a bigger hole. When you think all the dots are connected, put a light behind the seam and find how many are still there!Comment
-
Aha - good point Bruce. I have used those clamps for new metal, not replacing cut and repaired metal. No, I don't have many tools that will cut that thin. The thin Dremel would be the thinnest I have/use. Well, gotta get the side door opening metal finished up first anyway. But that is after I finish painting our guest/granddaughters bedroom, putting new shocks and ball joints on our camper, and a bunch of other spring projects( cut/split/stack next years firewood). And, supposed to get up to 3" snow tonight. Glad I have not summerized the snow blower and shovel yet.
PhilComment
-
"It's amazing how long it takes to finish something you are not working on."
Great line and so very true Bruce! Nice tip on thinning the clamp shank. I too have experienced some difficulty with their removal after the joint shrank up. You have to get the pliers out to wiggle it free and of course the last bit with the square hole catches the edge of one side bending it outward. Good stuff! Thanks!
More snow on the way Phil?? Winter has been officially over out this way for several weeks now. Its already working its way up into the 80's! Its probably going to be a brutal summer... Keep at it! Justin
Justin Rio
Winter has been officially over out this way for several weeks now. Its already working its way up into the 80's! Its probably going to be a brutal summer... Keep at it! Justin
Justin RioComment
-
Nice interesting thread this one. So much to learn but of course reading is different to doing it. I liked your comment about poor door repairs Bruce, I only wish this forum had been around 37 years ago when I welded mine. I attacked the job ( literally ) with a gas welder and no special experience. All these tips on here over the past year or so would have made all the difference. I really thank you guys for your effort in not just doing the job but detailing and taking photos as you go. Super
RoyComment
-
Roy
Your input and sharing of your experiences is appreciated. I am waiting for you to start a thread on your next project. It should be good.
PhilComment
-
Thanks Phil for the templates. Here are some pics with your templates on my replacement nose.
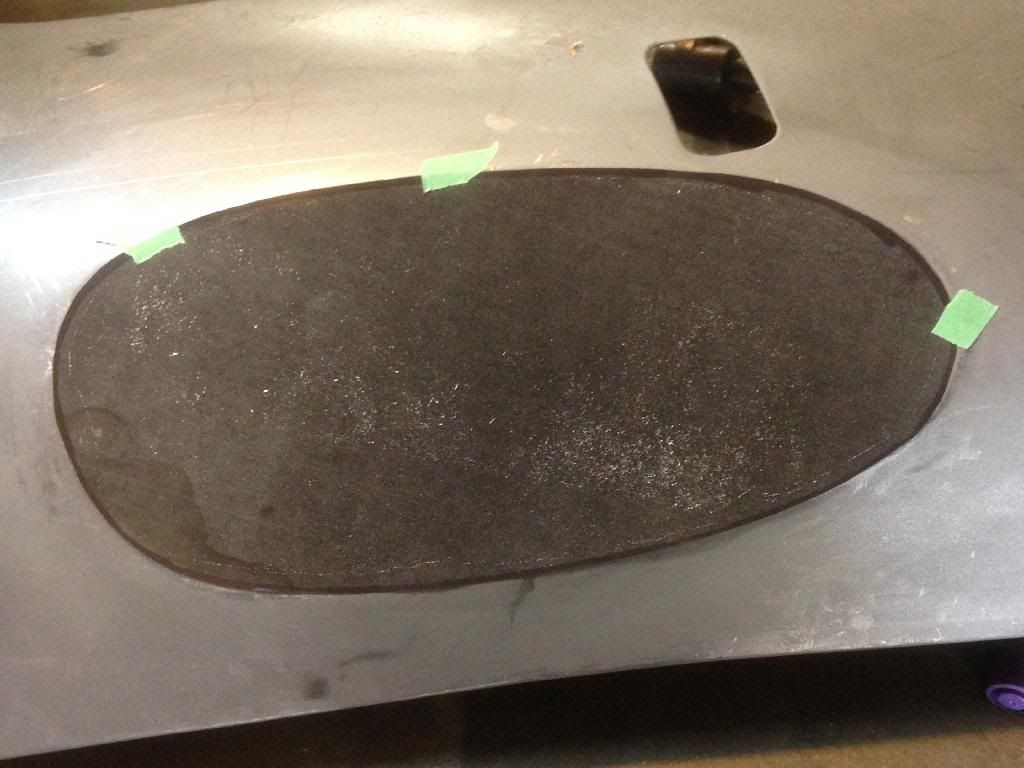
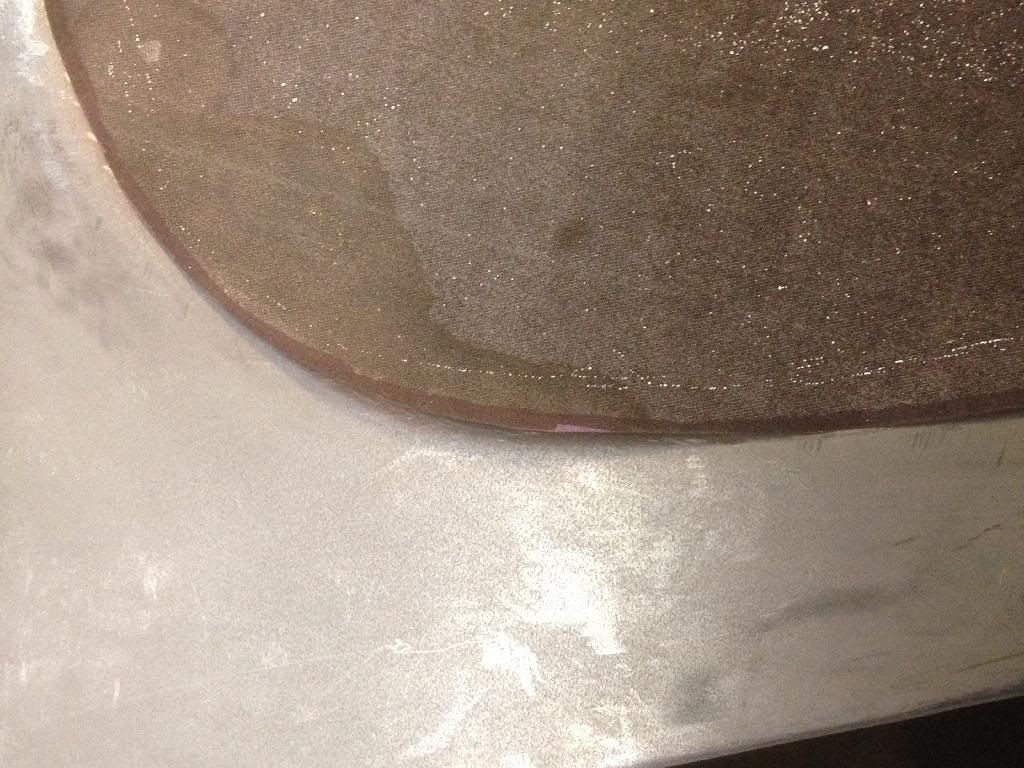
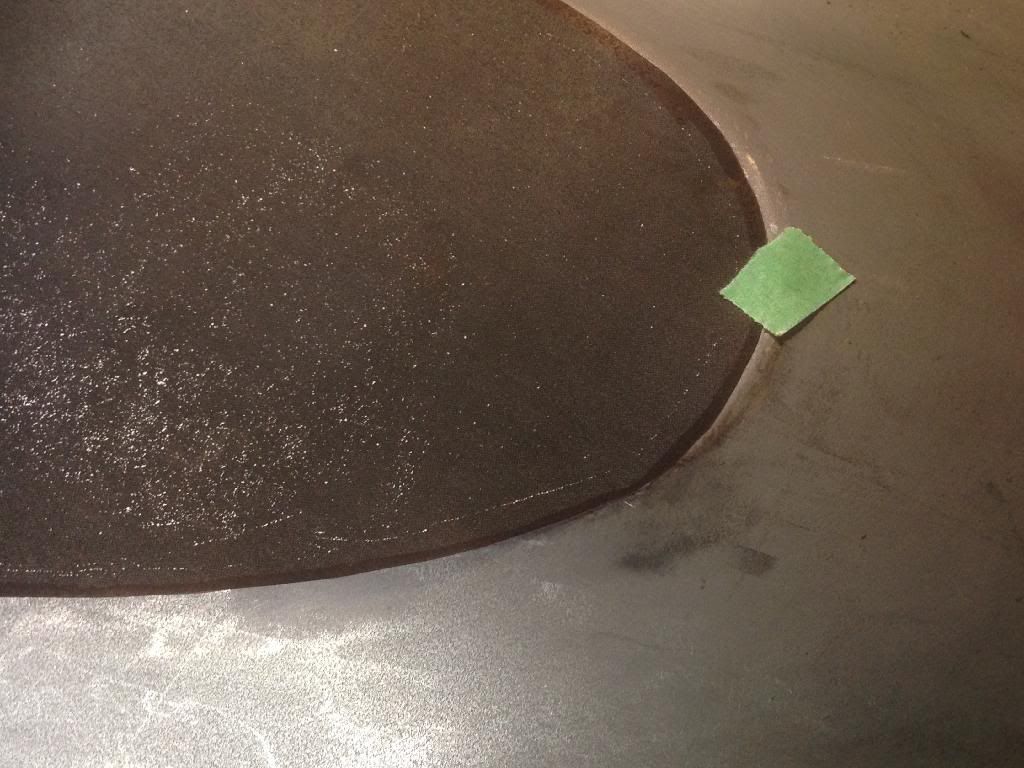
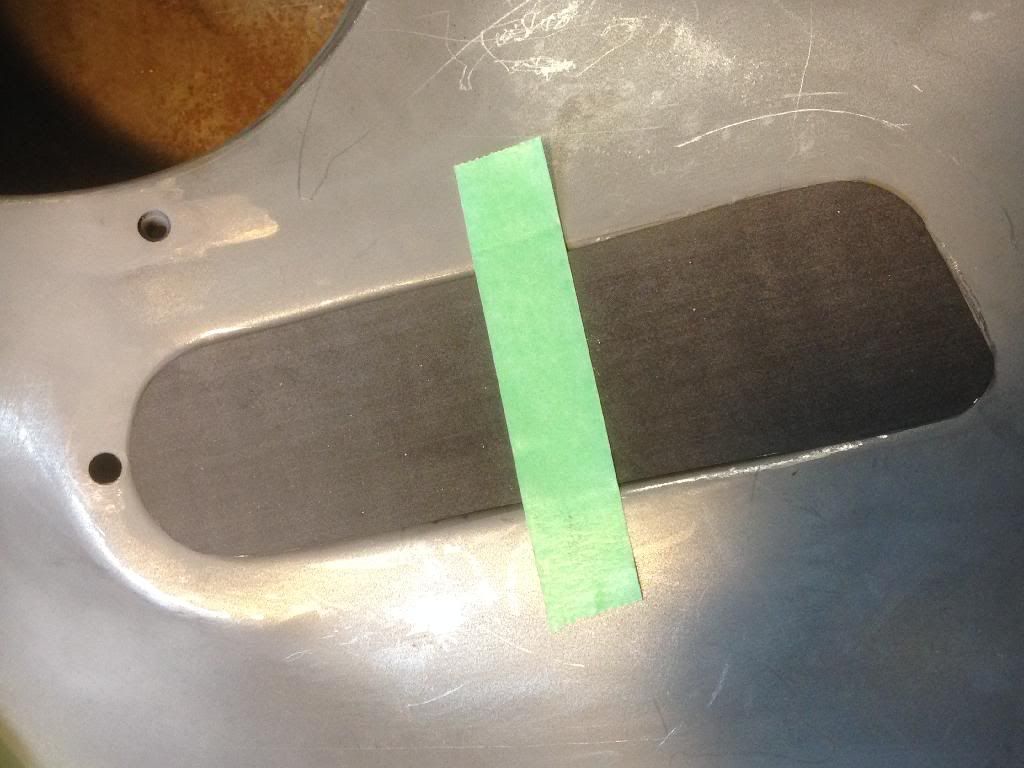

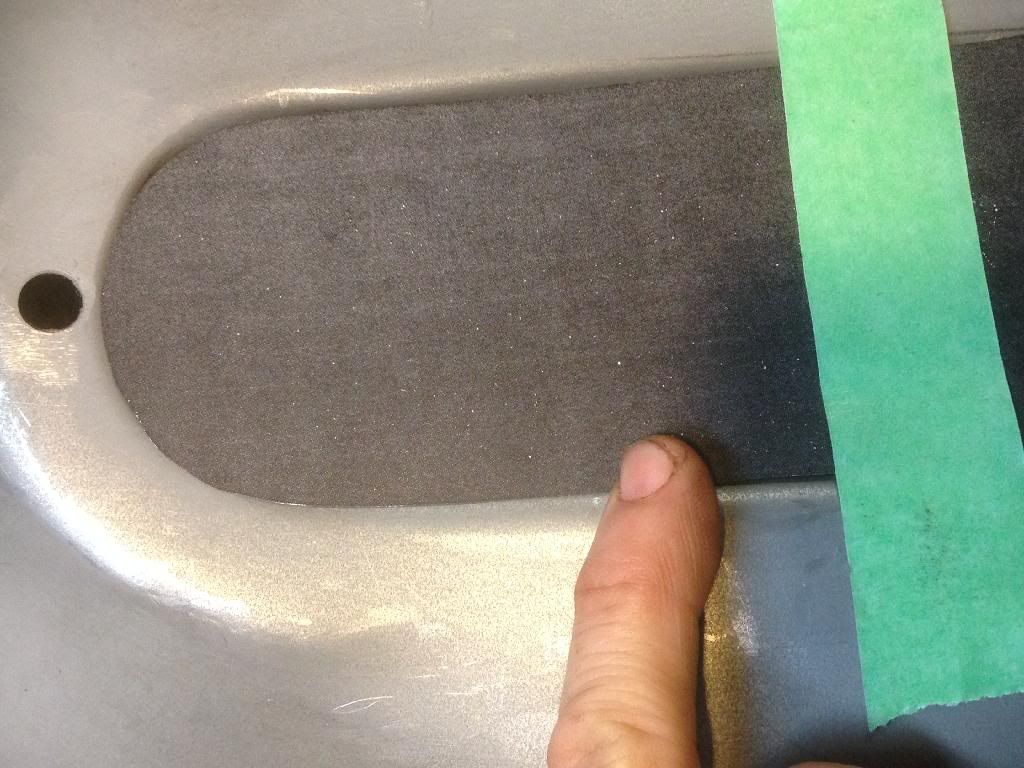
1/8" was trimmed all around the template to reveal the discrepancies better.
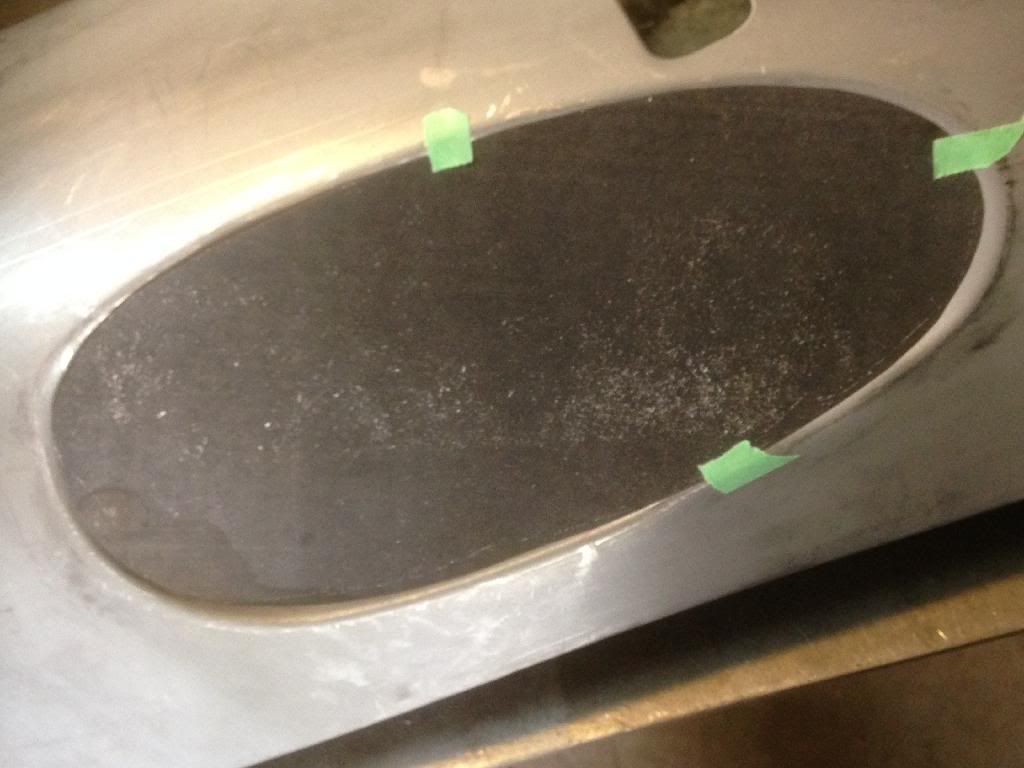
Your templates fit better on my original nose, than the SMC one. Sorry I don't have any pictures on my original nose. My car is shoved near the wall and the lighting wasn't great. The last picture shows at the 10 O'clock position a problem with my nose. Also the 4-6 O'clock curvature is a bit off on mine.
You are lucky to not have to modify anything. Best of luck with your nose replacement.
In terms of cut lines, I would choose a) Best dolly access behind weld line, b) Highest curvature and c) shortest distance.
If it were me, I'd go with the passenger side cut line. (best two of three and you don't have to weld on the grill flanges).Comment
-
Slow progress on Foamcar, but managed to get in a few hours to shorten the rear of the rocker a total of 1/2". Got the slice which removed 1/4" welded up. Re-installed rocker to mark for movement of rear edge:
Took about an hour to open up the rear and move it forward. Close enough now for finessing:
Here's how far back it was before the "adjustments":
Attached FilesComment
-


Comment