-
Ha I tricked you, that was done with my MIG!Originally posted by JTR70" post=21201Leave a comment:
-
Very cool Tom! Pretty weld bead down in that hat!!! Doesn't get better than that! I need a TIG...
Leave a comment:
-
Thanks guys, here's a picture of the tooling.
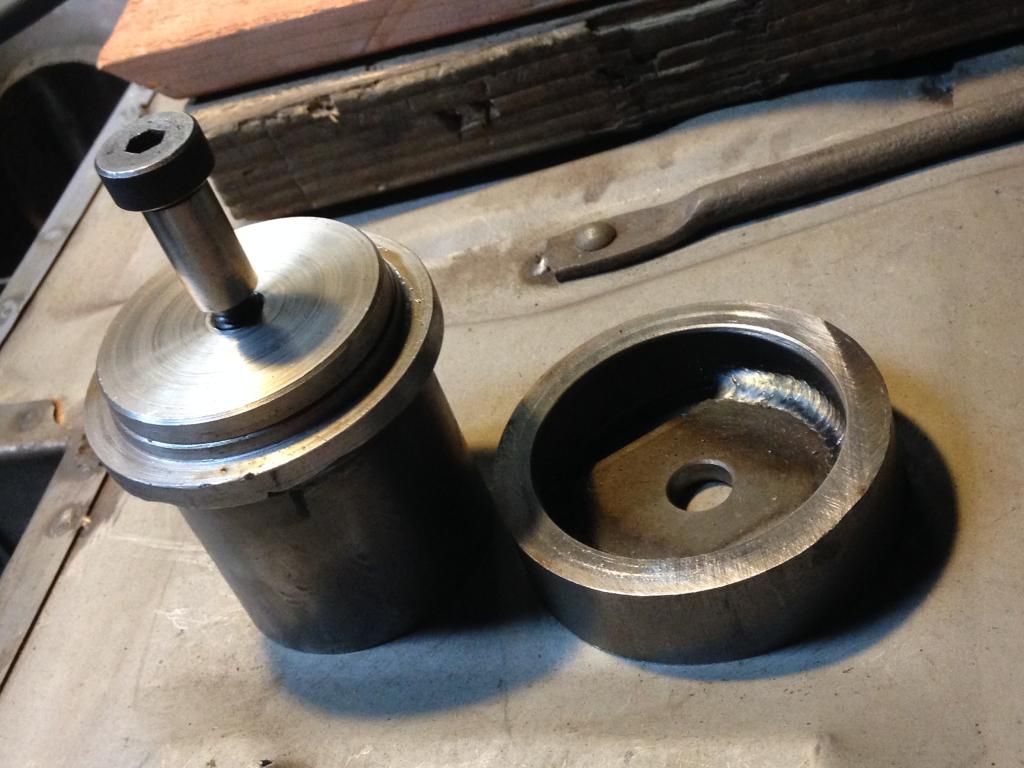
The hat section slides on the shoulder bolt and the whole thing goes into a press to create the ridge.
The holes and blanks were cut with a CNC plasma cutter. The rolled plug flange is a fake and was welded and brazed together. Tricky, but good enough to fool just about anybody.
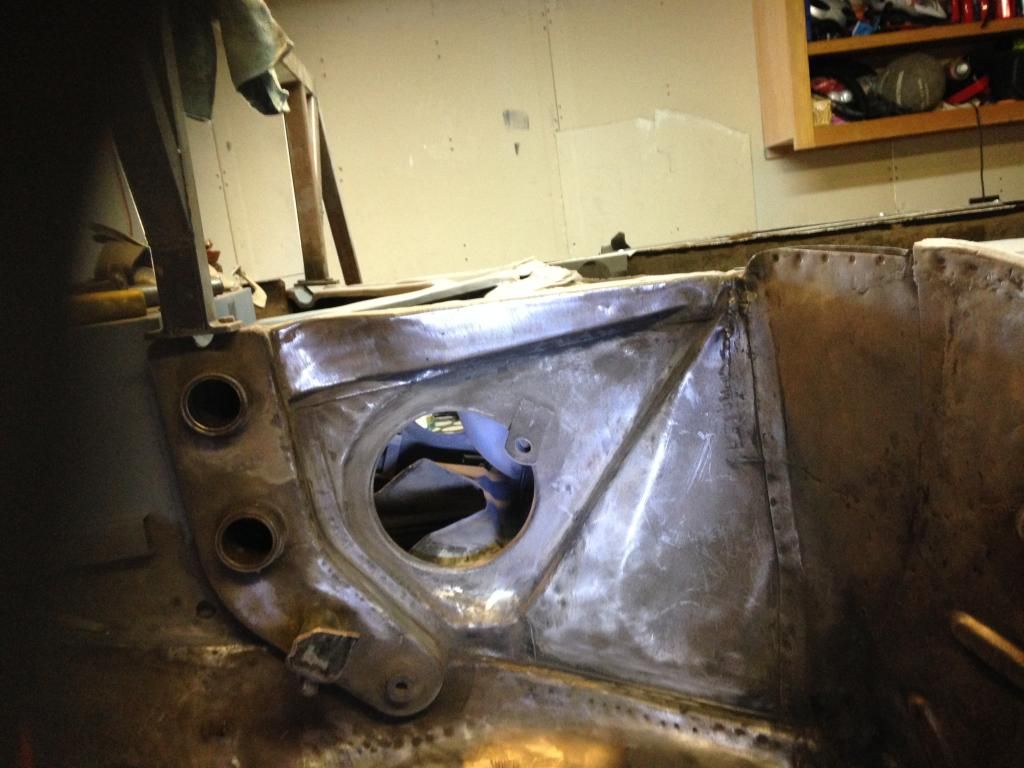
John, I thought of your project when working on my car today. After rotating my car upside down I took this picture for you. I hope it helps, but it sounds like you and Phil already figured it out.
Thanks,
TomLeave a comment:
-
Nicely executed Tom and a very generous offer to help the next guy along with these. Great job! JustinLeave a comment:
-
Looks great, Tom. Did you also invest in the punch/flares to make the necessary holes? Very professional. Can you so post some pictures of the process?Leave a comment:
-
Thanks everyone for the comments! Phil those repairs came out nice on the wagon. Glad you got er done in the planned time frame, more or less. Its not easy to finish on time, which is exactly my point.
Bruce, I loved the MIG and toothpaste analogy. And yes, aluminum is really cool to weld with TIG. Different, but fun. Some say its easier to learn on aluminum because its easier to see with a larger puddle and all.
Here is my latest crazy attention to detail.
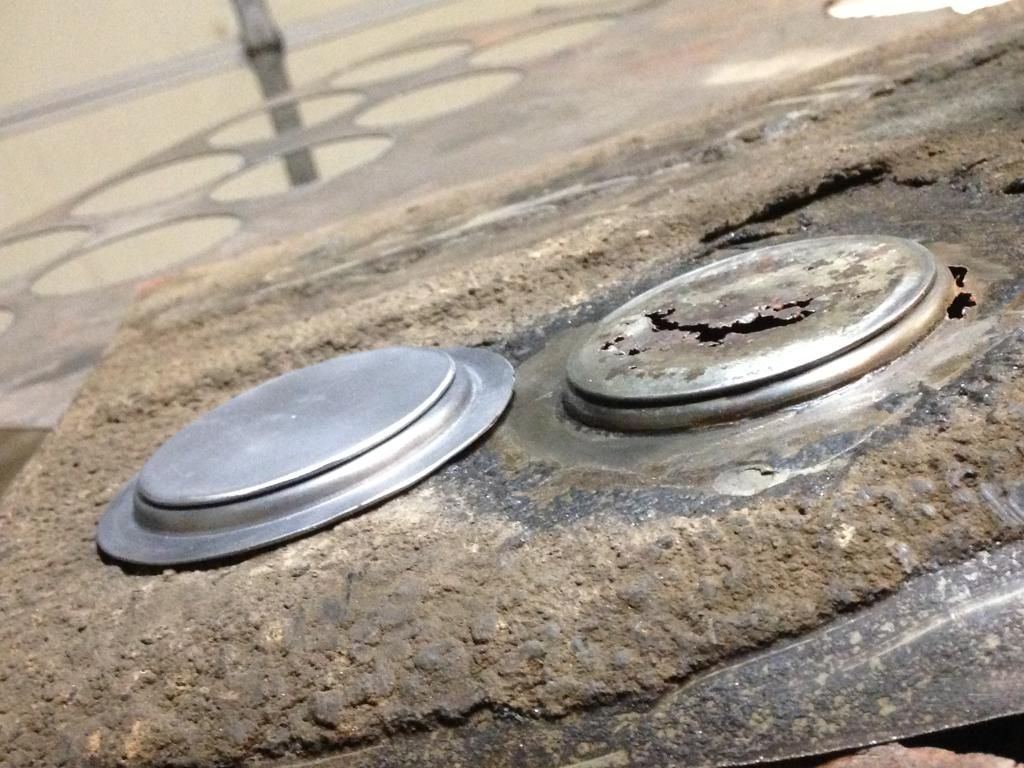
Karmann made cars have these strange floor plugs that are also in the rear seat pans. The picture above is my original seat pan with my creation next to it. The plan is to weld these in so that no one can tell that my floor pans were replaced. Some may remember that I already replaced my seat pan bottoms years ago, so I will simply graft these in. There are four more in the floor pans too.

Inside view

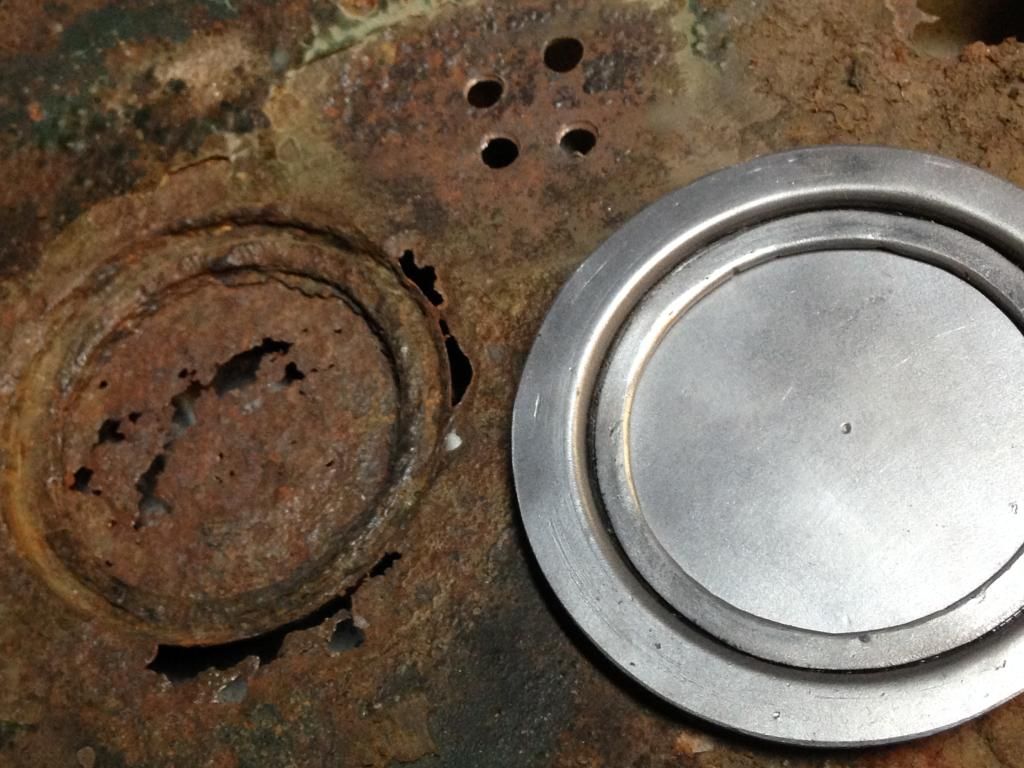
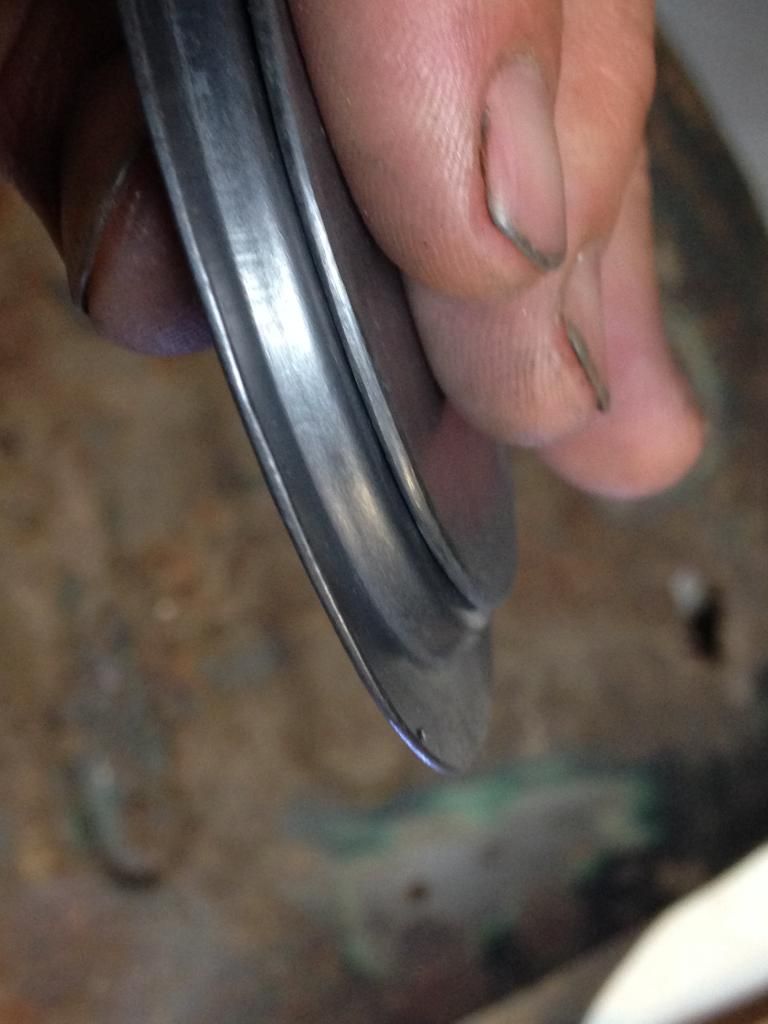
Detail with a capital D, Ha ha. I invested in some tooling for these, so I can make plenty if interested.
Thanks,
Tom
858-243-0476Leave a comment:
-
Bruce
Had a taste of a production shop this last week working on my Grandson's car. He had to get back home(200 miles away) Saturday and drove up Monday morning with a big list of projects, varying from electrical, trim and rust repair. I put in a good 8 hour day each day trying to accomplish his list. One repair I knew was going to take way too long(replacing a power window motor) so I made the customer happy by lubing the tracks and applying special sector grease(my GM division made window regulators) and got the window going up and down pretty good with the old motor. Sent the wife to the paint shop to get 2 rattle cans of paint made up to save some time. Anyway, I was not sure we would get it all done, but we did and he drove out with a big s--- eating grin on his face. Of course his bill was zero and the quality was okay by his standards. If I would have had more time I would have thrown away the outer repair panel as I was not happy with it, but was able to salvage it with some weld "sculpting".
It will nice to get back to my leisurely, hobby restoration of Foam Car. At least my wife now appreciates why it is taking so long, as she came out to check progress often, which she never does on Foam Car. And this was just to fix one small rust area.
PhilLeave a comment:
-
Fits right in with the song by Meatloaf; "Two outta three ain't bad." In the trade, we use "Cheap, fast and good...pick two."Originally posted by tperazzo" post=20626
It's like what I tell insurance customers that ask if I can save their deductible. I say "Sure...what is it that you don't want me to do during your repair? Paint?"Leave a comment:
-
Tom, when MIG use became popular, I went to a local manufacturer (Systematics) to buy one and the demonstrator said that if you "could squeeze toothpaste out of a tube, you could MIG."
He also said that it would take longer to learn MIG if you already had welding experience with gas. He preferred to teach novices. I still bought a MIG.
My initial experiences with welding as a teenager were with a gas torch for sheet metal and a stick welder for building trailers. I use my TIG for aluminum and other 'exotic' metals or building a roll cage for a race car with 4130. The small gas torch is regulated by two knobs on the valves for the 2 gases instead of the pedal of a TIG, but yes, the heat source there is variable. It all comes down to the fact that they all work, it's just personal preference and the awareness that to be good with any you have to use them a LOT!
Keep up the good....no, great work!
-BruceLeave a comment:
-
Thanks Roy and Bruce!
Good commentary as usual. I see quality, cost, and time as a triangle where I only can do two corners well. You've all seen how cheap I am as I've made parts myself that are readily available. I've tried my hardest to repair my car in the highest quality way, in some cases overkill. ie. Remember the hood gussets, or the grill openings in the nose, just to name a few. Everything I do takes more time than it should while I'm learning and practicing at the same time. See there's that word again, time time time...my enemy.
This has been touched on in Justin's thread, but to run a 356 business you're required to do all three simultaneously and for me that is impossible. So kudos to you Bruce! My guess is some customers want to lean towards quality and are willing to pay more for it. Others may want a budget build to enjoy quickly for the next regional show. To have that flexibility is difficult and only comes with experience.
Others on this site blow me away, such as Gordon's upholstery. The thought never crossed my mind that this could be DIY and he made it look easy! Of course Justin is always cranking out cool stuff while amazing at the same time. Everyone's project on here are really cool and I learn great stuff all the time. I just used Phil's recommended dremel discs and loved them. I remember Rusty's coupe on the R's site and thought that was really cool and fast.
Please ask here if you're curious about any steps shown on my coupe. And I never look down on others work, they might have different combinations of quality, time, and cost than I do. Most important is get out there and build something. That's my therapy but your mileage may vary, ha ha.
I want to try gas welding someday. Mentally it seems very similar to TIG, just a different torch mechanism. Definitely something I want to try. The TIG pedal is very handy in controlling the heat input and I'm not sure if gas welding has that kind of control or not?
Regarding hammering welds, I hammer when warm too and before grinding. It gives me something to do while the surrounding metal cools down. Previously I mentioned hammering after grinding and I do that too, but its more for cosmetic purposes when trying to smooth the weld. Sometimes there are little valleys next the weld that you can't really smooth until things are flatter.
Regarding the total time to weld this long seam was probably about 1 hour after tacked. Proably 3x that to trim and a fit the part. The welding time is really limited to cooling time and distortion removal with hammer and dolly. Its really not that bad and I don't think its any slower than MIG. I've heard people say TIG is too slow and I never understood that. Lately I've been working on increasing the current and increasing the torch speed at the same time. There are some guys on metalmeet.com that swear that this technique reduces distortion. My weld speed is no where near what they recommend, but I'm working on it. What they are saying is actually faster than MIG, much faster.
Bust out the TIG and the pictures Bruce! I know what you mean about mixed feelings. After leaving the Dana Point show I felt pumped after seeing so many great cars, but I also felt like a loser for not having finished mine yet! Oh, I wish I wasn't cursed by time!
Thanks for the sense of community here, its fun to hang out.
Peace, this must be my longest post ever.
TomLeave a comment:
-
I must echo Roy...it's such a pleasure to have a place where it's quality not quantity of people involved. I sense no 'holier than thou' actors here, just guys with talent, patience and an interest in learning, sharing, teaching and the cars themselves.
There is an air of justifiable personal pride in this 'show-n-tell.'
I could scan and post pre-digital pictures and those taken with the more current methods of photography .... showing my own version of what's been posted here, but none would be any better than what's seen here, posted by others (here and in other threads).
Very 'old school' and the way I was trained 30-40 years ago by guys now long gone. Does my heart good to see a continuation of both skill and common sense and attention to detail.
One thing, Tom...you have me thinking of dragging out my old Miller 180 TIG, but I'm still comfortable with an 'aircraft'(small, light) oxyacetylene torch. I tack my seams with my MIG, 'lacing' a long run with minimal heat (with non-sticking metal back-up), lower any small amount of build and then gas weld a short distance and 'beat the contour out of it.' Maybe jumping the gun, but that works well on door skins, especially if the repair has been rolled to a (subtle)matching contour of the original skin.
The old boys didn't grind before hammering the weld, they'd just put the torch quickly in a stand and 'strike while the iron is hot,' I do even the weld and often reheat, but a cut-off wheel has to be controlled to not make the weld concave. A high crown is easier to control, a low crown is the challenge. You 'beat it up' and shrink it down until it looks and feels 'right.'
There are more than a few guys still doing this work that elicit mixed feelings in me, one being that of me feeling like an apprentice in any and all areas of 356b restoration, even after almost 50 years of OJT, but that's a good thing, as everyone can learn something as no one can know everything.
-BruceLeave a comment:
-
Tom,
Really enjoyed looking at your latest welding and instruction. Thats a really fine job. You must be pleased with your own effort its super!!
RoyLeave a comment:
-
Ha ha, I wish I had the metal surgeon! I just Photoshop'd it instead!Originally posted by JTR70" post=20600

Leave a comment:


 Okay Tom, I call "bull shit"! You had the guy who calls himself the "metal surgeon" over to your house this weekend, didn't you!?
Leave a comment: